azkanan Posted November 17, 2009 Author Share Posted November 17, 2009 In this tutorial, I will show you how to make a base World Map for you to work from, and if you plan to impliment a world map in your game, it is an excellent guide for adding the basic map features. (Land, Water, Mountains and Forests).I will only go as far as to show you how to make Land, Water and Mountains. The way that the forests can be made is the exact same as mountains, so simply redo that for woodlands. ;)This is what we will make (It took me about 30 minutes):(I rushed it, so there are a number of bugs with it :( )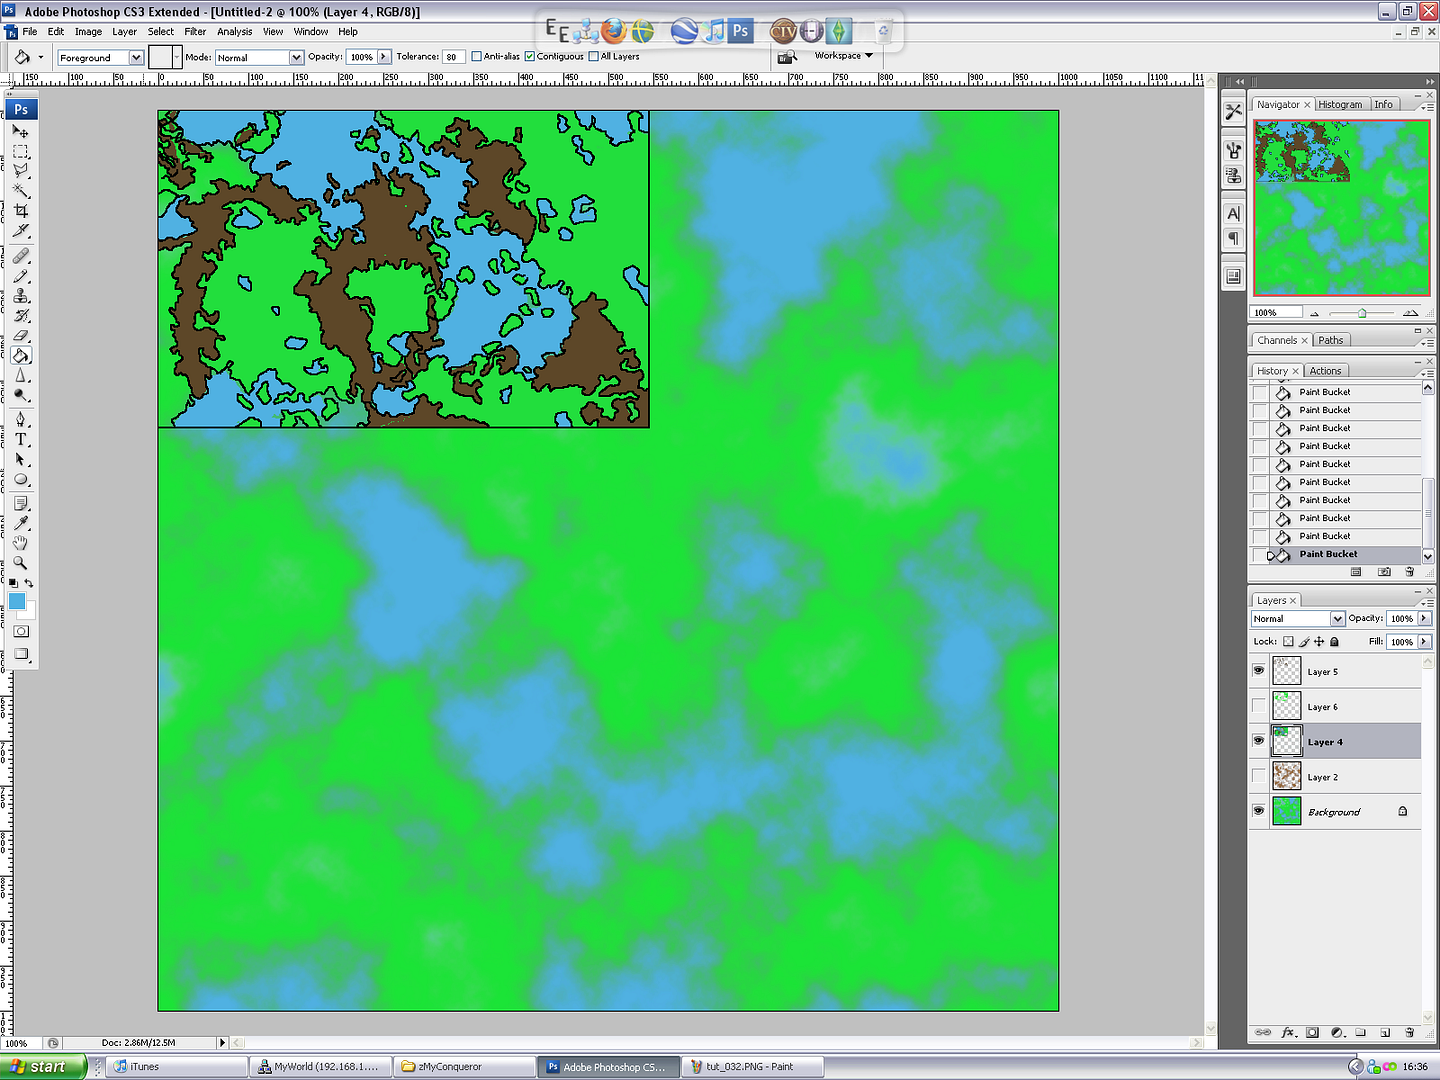**Step 1: Set The guides**First of all, you will want to set the guides. For me, these are essential. I can't really concentrate without them… Some people may not need them at all. Either way, you'll need them later on, so you may aswell get them out of the way.Edit --> Preferences --> Guides, Grid, Slices and Count...Gridlines every: [32] [pixels]**Step 2: Create a new blank page**Now, I like mine to be around 1000x1000\. Rounded up/down to the "every 32 pixels" rule, we will use 1028x1028\. If every grid-space is a map, this means your world will be 1024 maps large, oddly enough. Go ahead, work it out. 1028 / 32 is 32\. then it's 1028x1028, so, 32x32=1024\. Weird, huh? Anyway.That's that. Make it a blank white._Note: If you want a smaller world/less maps, don't change the map size, this effects how it will look (Big and clumpy), instead, when done, change the grid to 64x64, which means you'll have 512 maps instead. 96x96 will be 256 maps. Etc._**Step 3: Creating The Base for Land/Water**Now, at the bottom of the left of the screen, there should be two colours. Make sure that these are Black and White; it doesn't matter which way around they are. I am using Black ontop and White underneath.(You can change these by clicking the squares)Also, make sure that this is happening on the BACKGROUND layer. Hit F7 to bring up the LAYERS window.Next, go to;Filter –> Render --> Clouds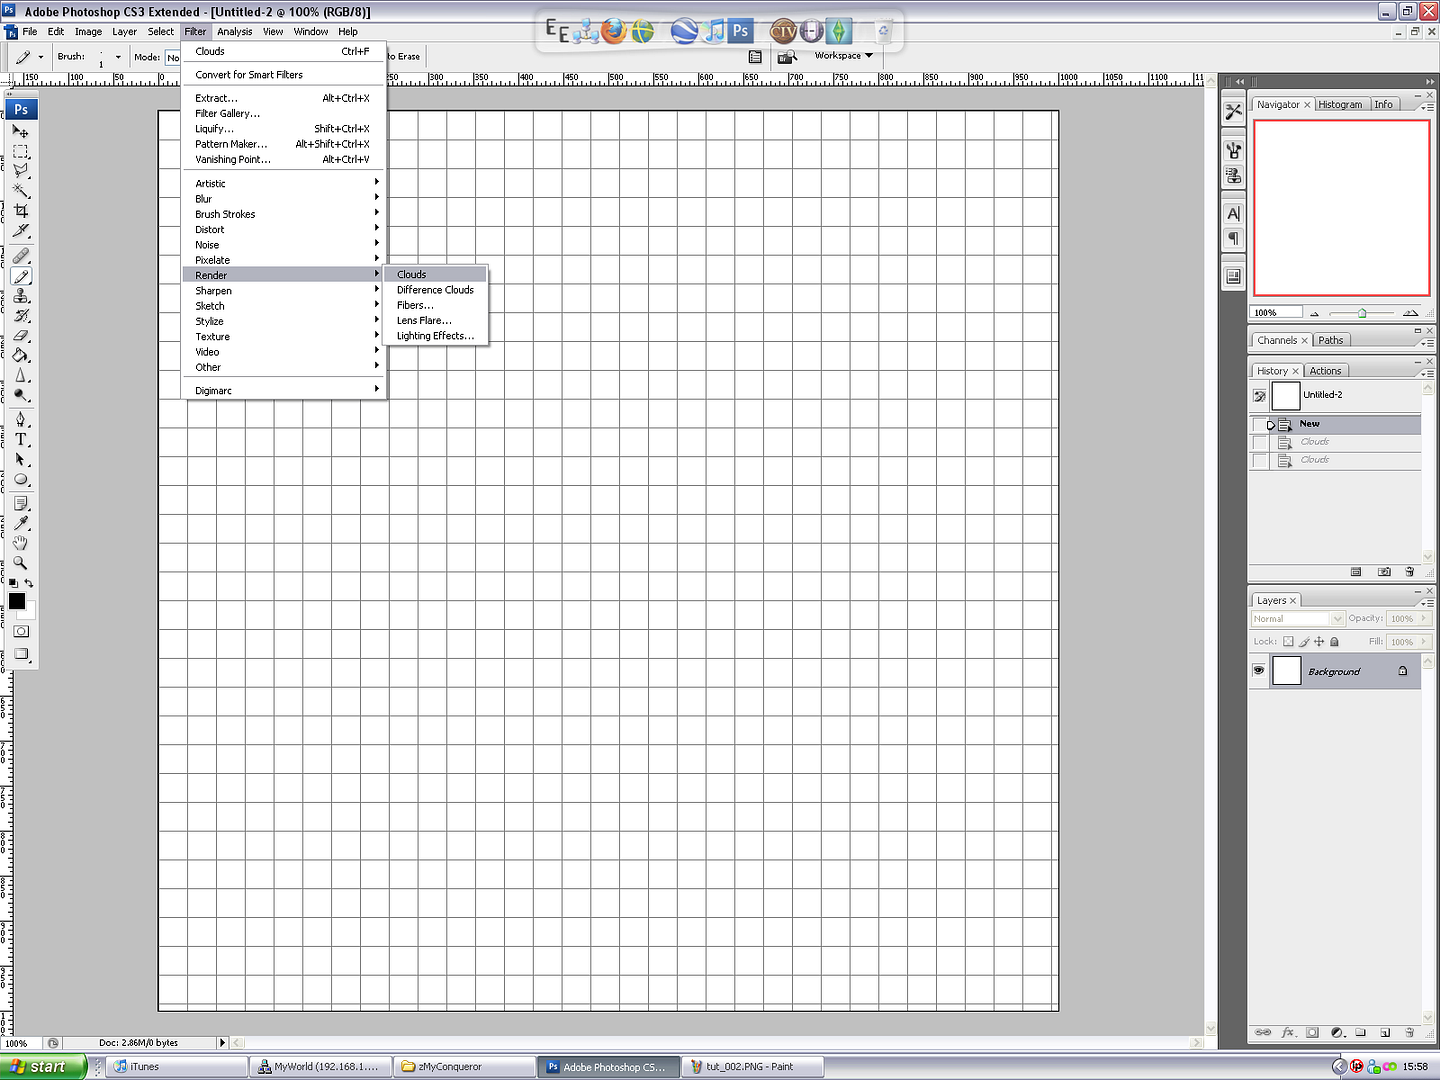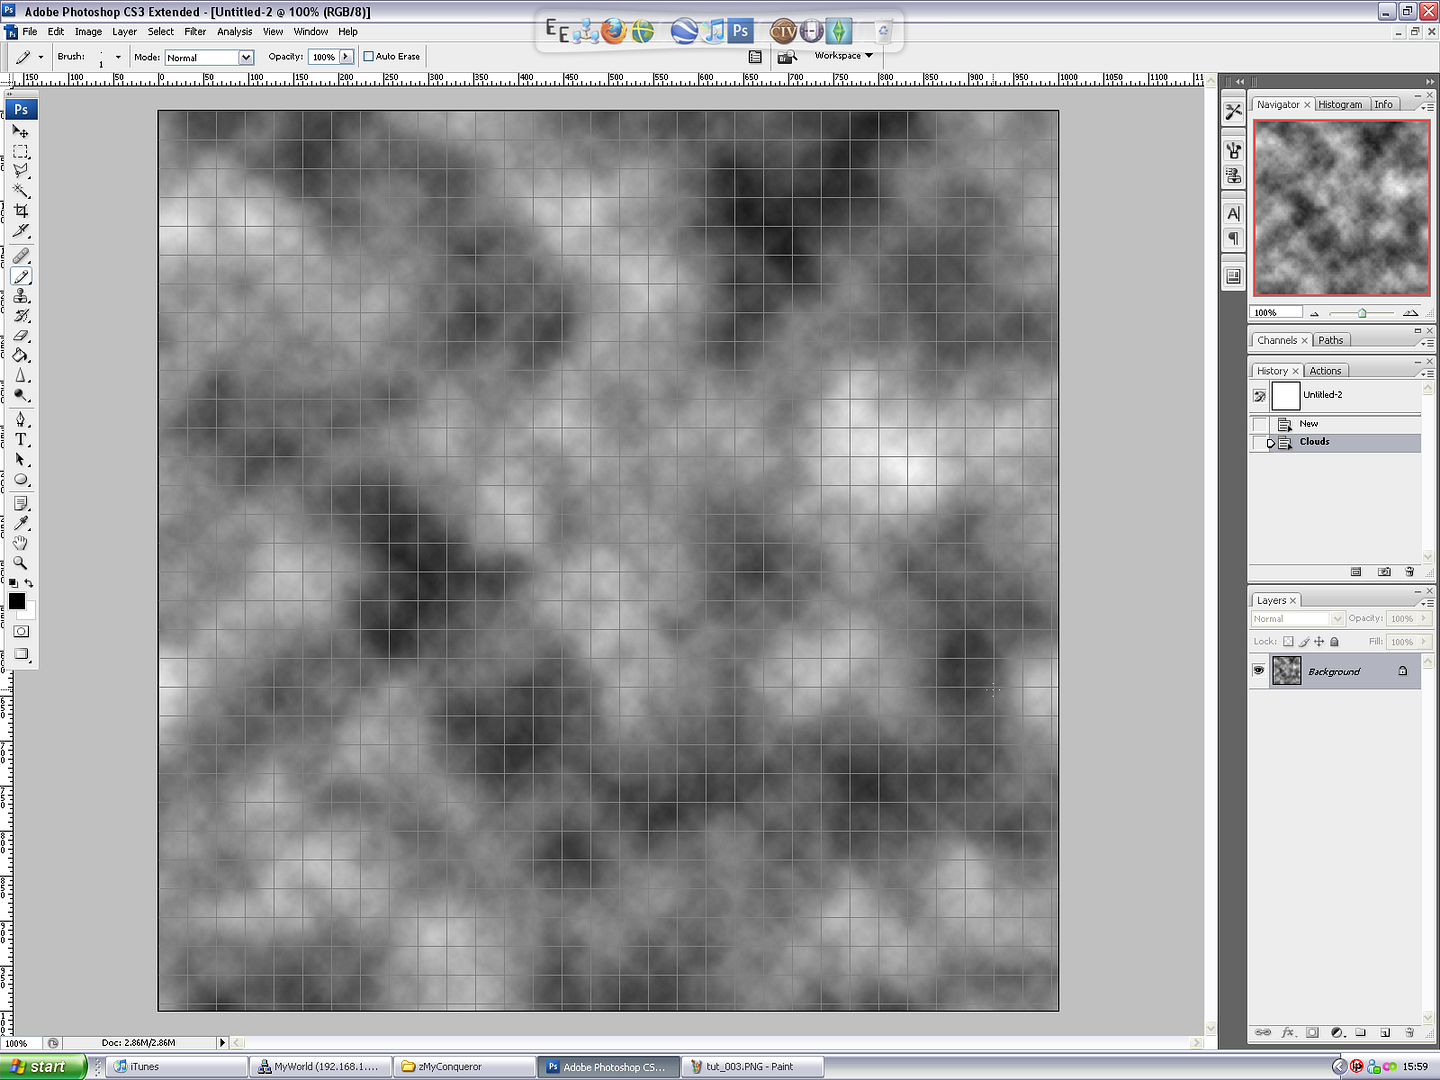You should wind up with something that looks remotely like a black/white cloudy sky.**Step 4: Opening the Floodgates…**Select –> Color Range...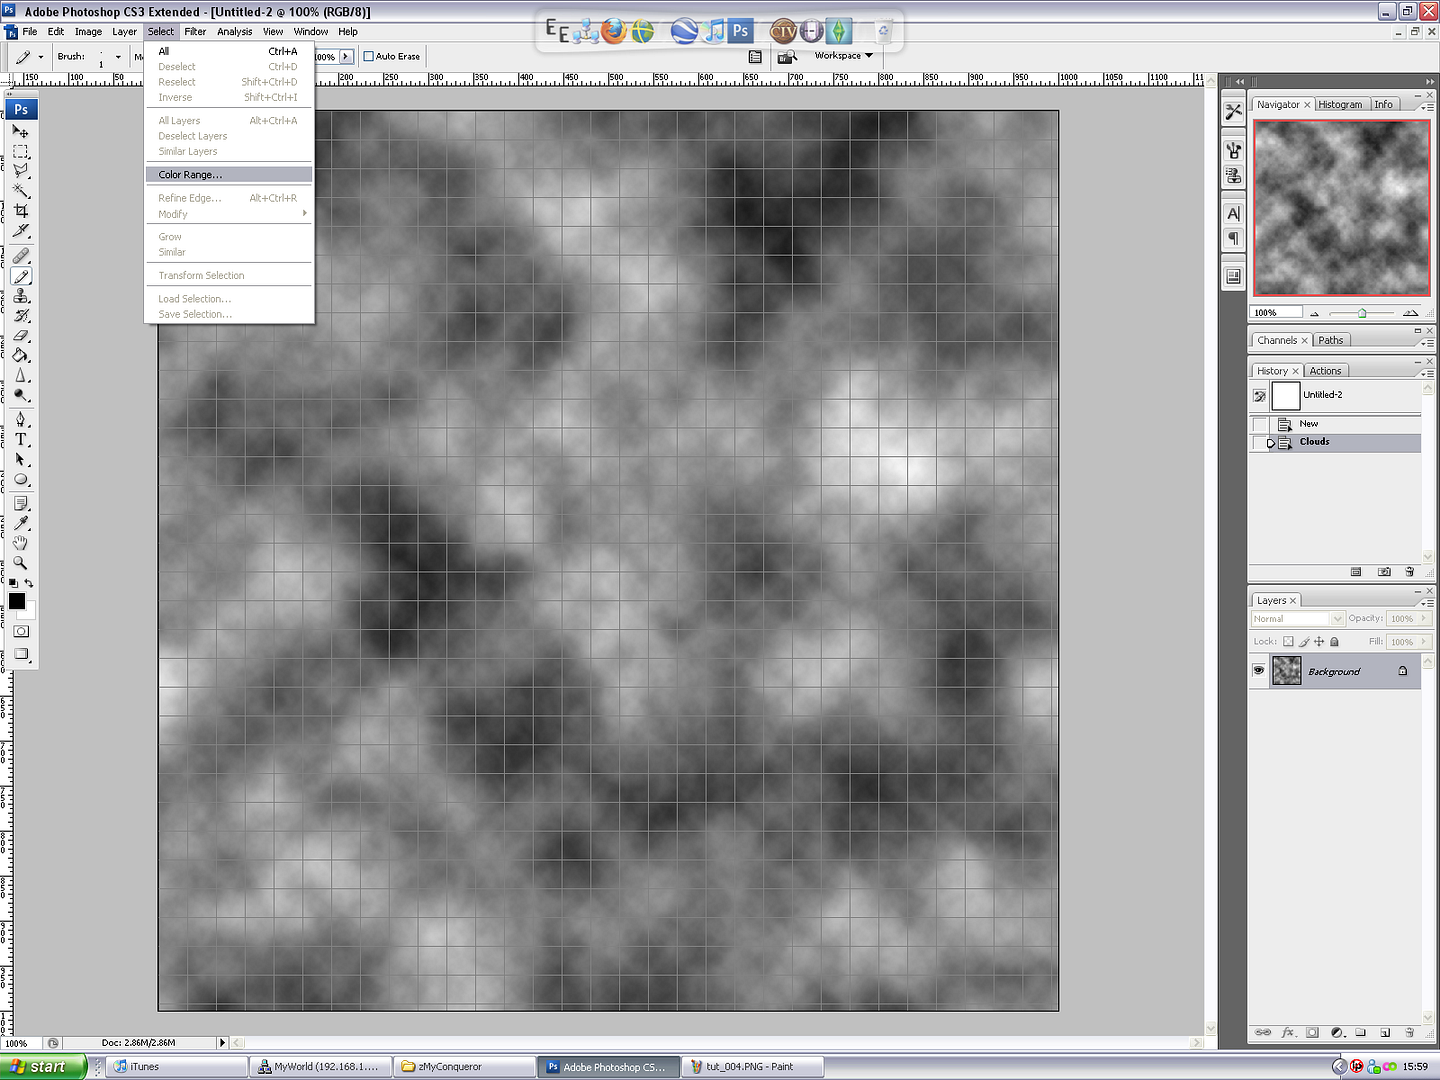This next part is kinda funky looking. On the image, click somewhere that isn't black and isn't white. Mess with the **fuzziness** _(Fuzziness sets the range color that will be selected… 1 Fuzziness will be that colour only, whilst 200 will be a large range. Set this somewhere between 50 and 150)_ setting till you get something that looks like white = land and black = sea. This will be the basic shape of your land/sea border, so mess with this till you get a nice even touch.Once done, Hit "Ok".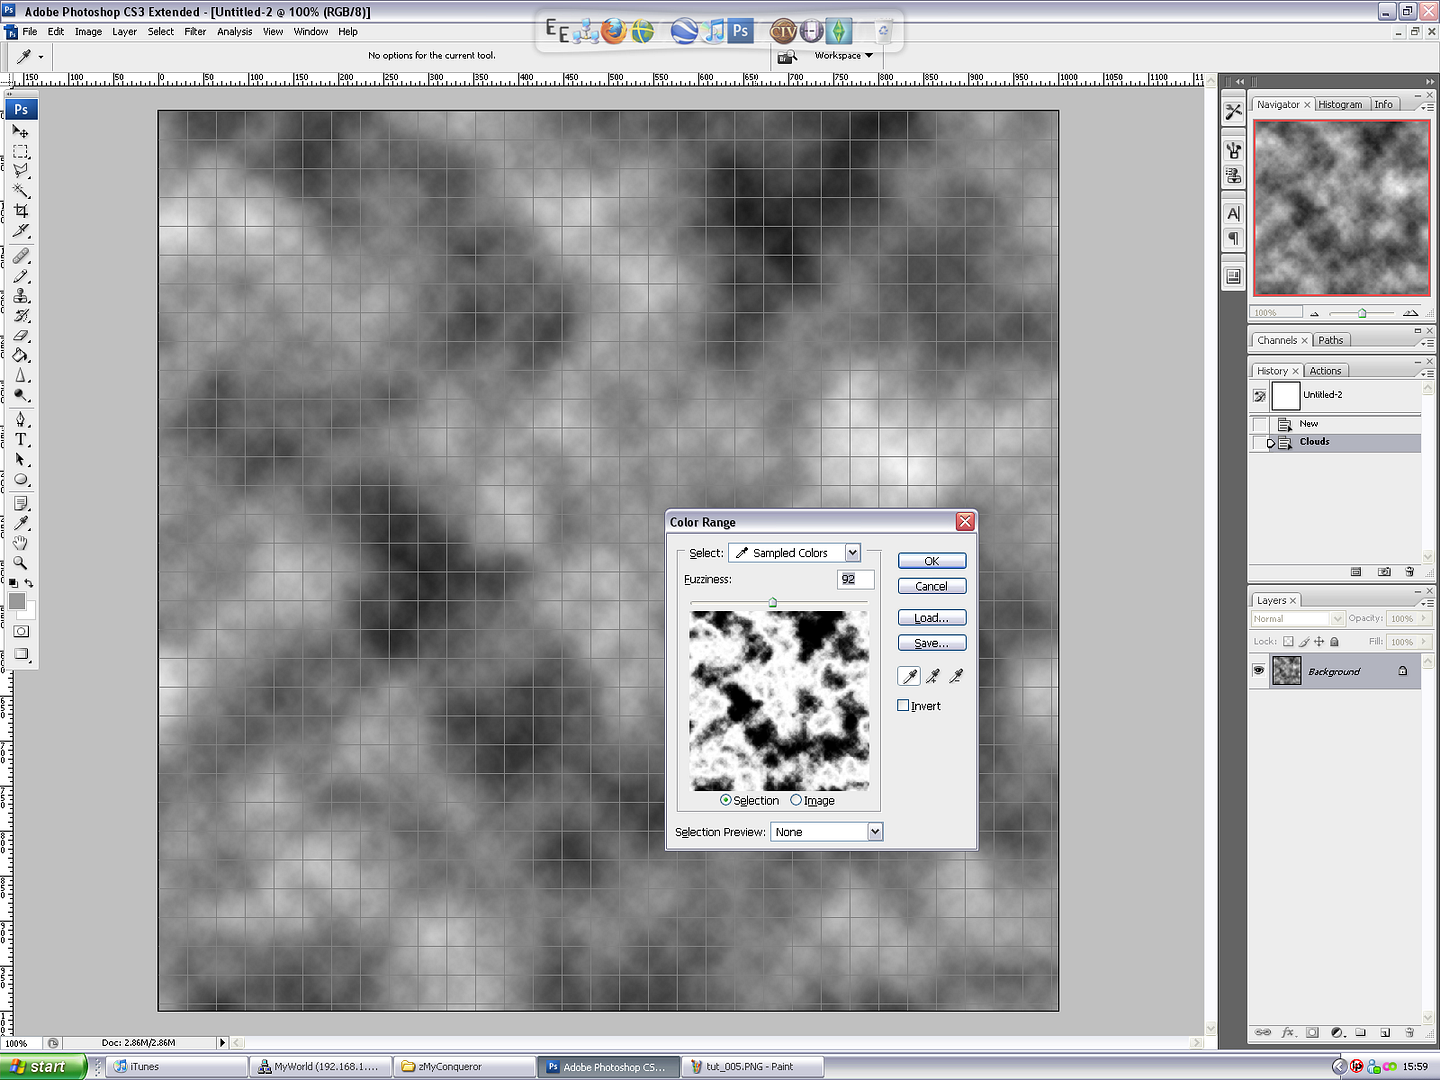Now, Click on your background colour (Two squares, bottom left, the one behind) and change this to a bluish color, then hit OK.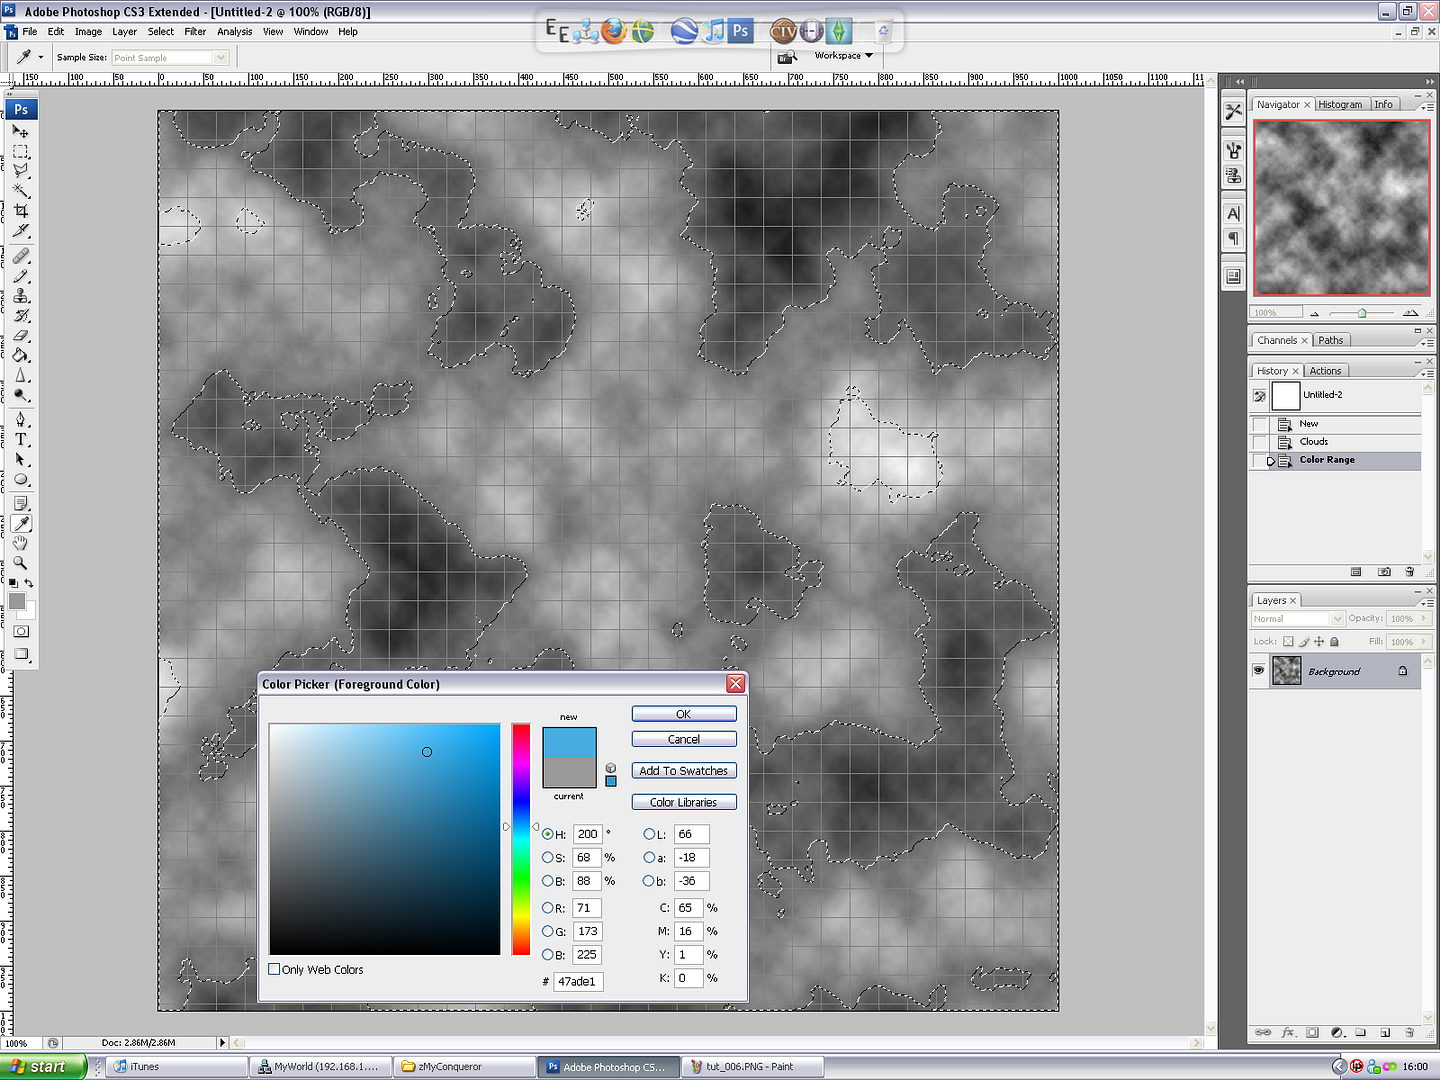Hit delete.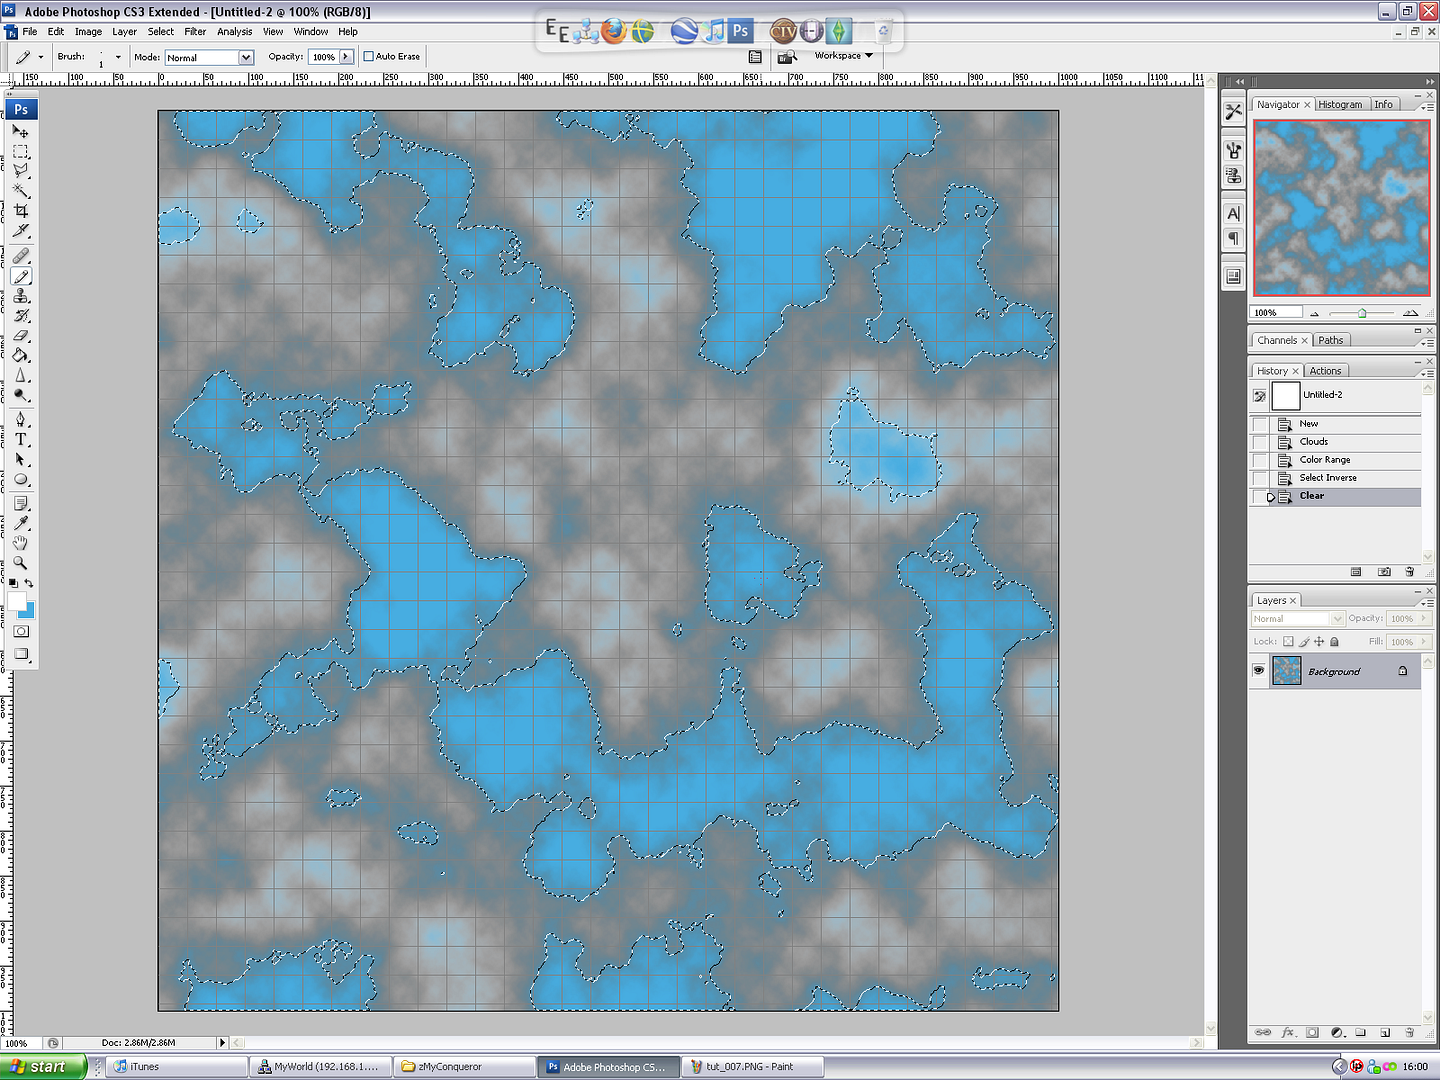**Step 5: Raising land from water**Change your background color to green, hit OK, then **"Ctrl + Shift + I"** Once.Hit Delete.See, what you did there, is, you changed the background color to green, then you INVERTED the selected colours and removed the clouds drawn. The program then checks what the background color should be, seeing as it just lost what used to be there, and selects your "background color". (Duh, obviously…)Anyway, Onwards!Now, select the Rectangular Marquee Tool and click anywhere on the image to deselect the selection. You should have something that looks like this: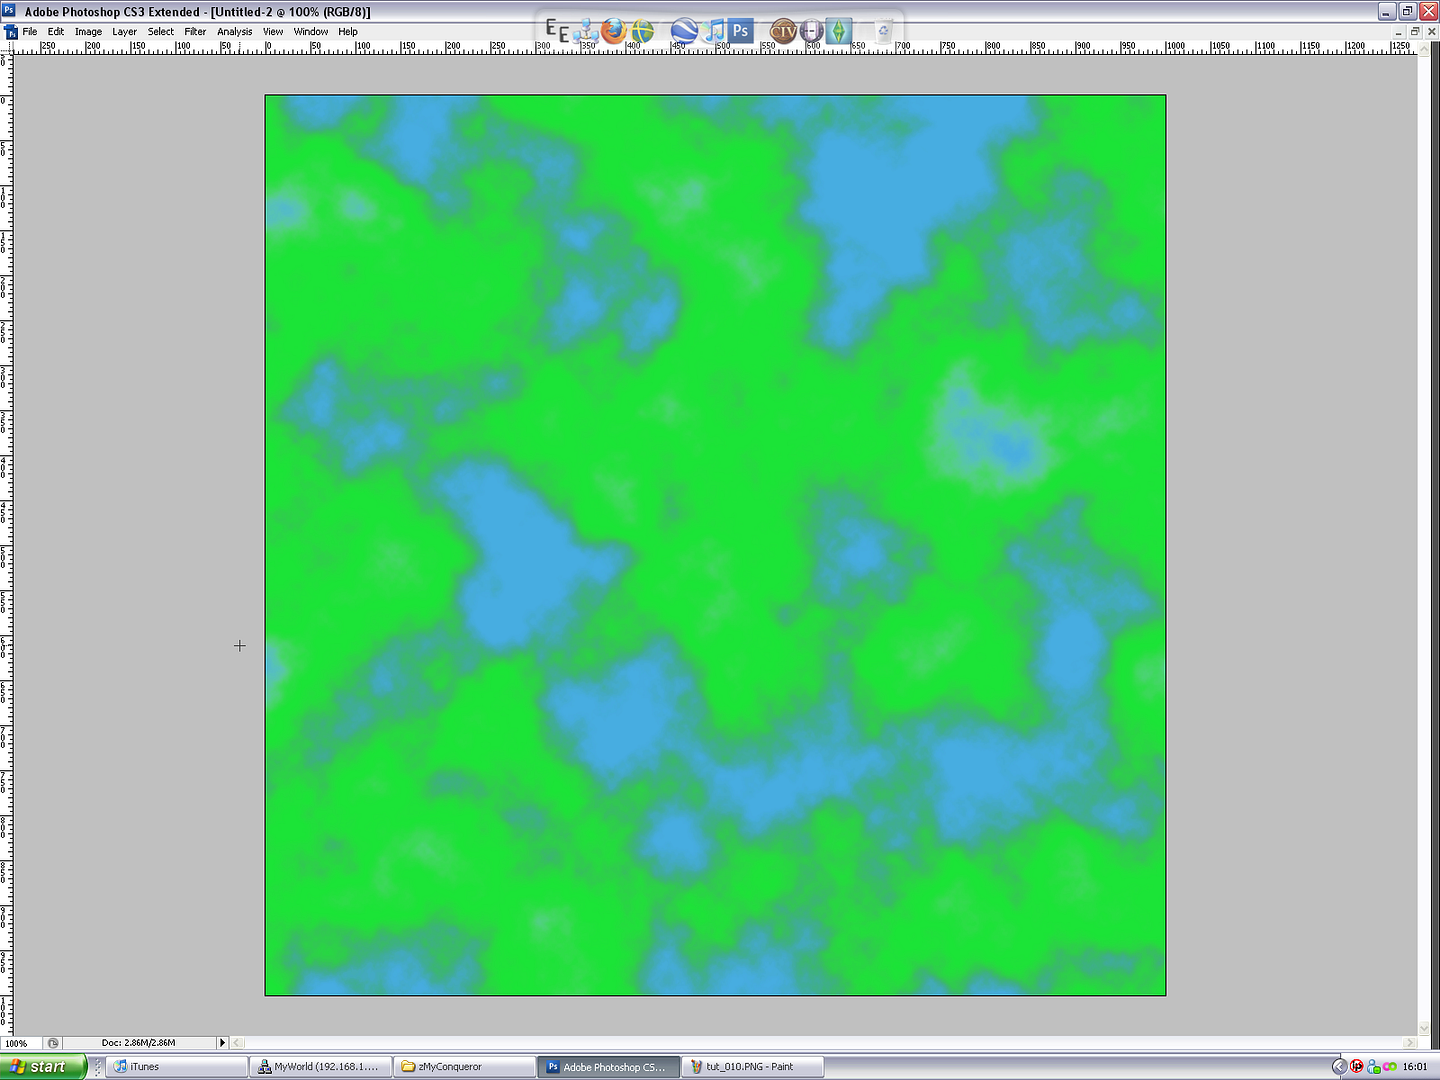**Step 6: Crafting the coast!**This part is the second most time-consuming part of the process - i've only done 1/4 or so of the map and boxed it off for this tutorial.Zoom into the place you want to start (I like to start at the top left) and select the Pencil tool, and set the size to **2** at the top left.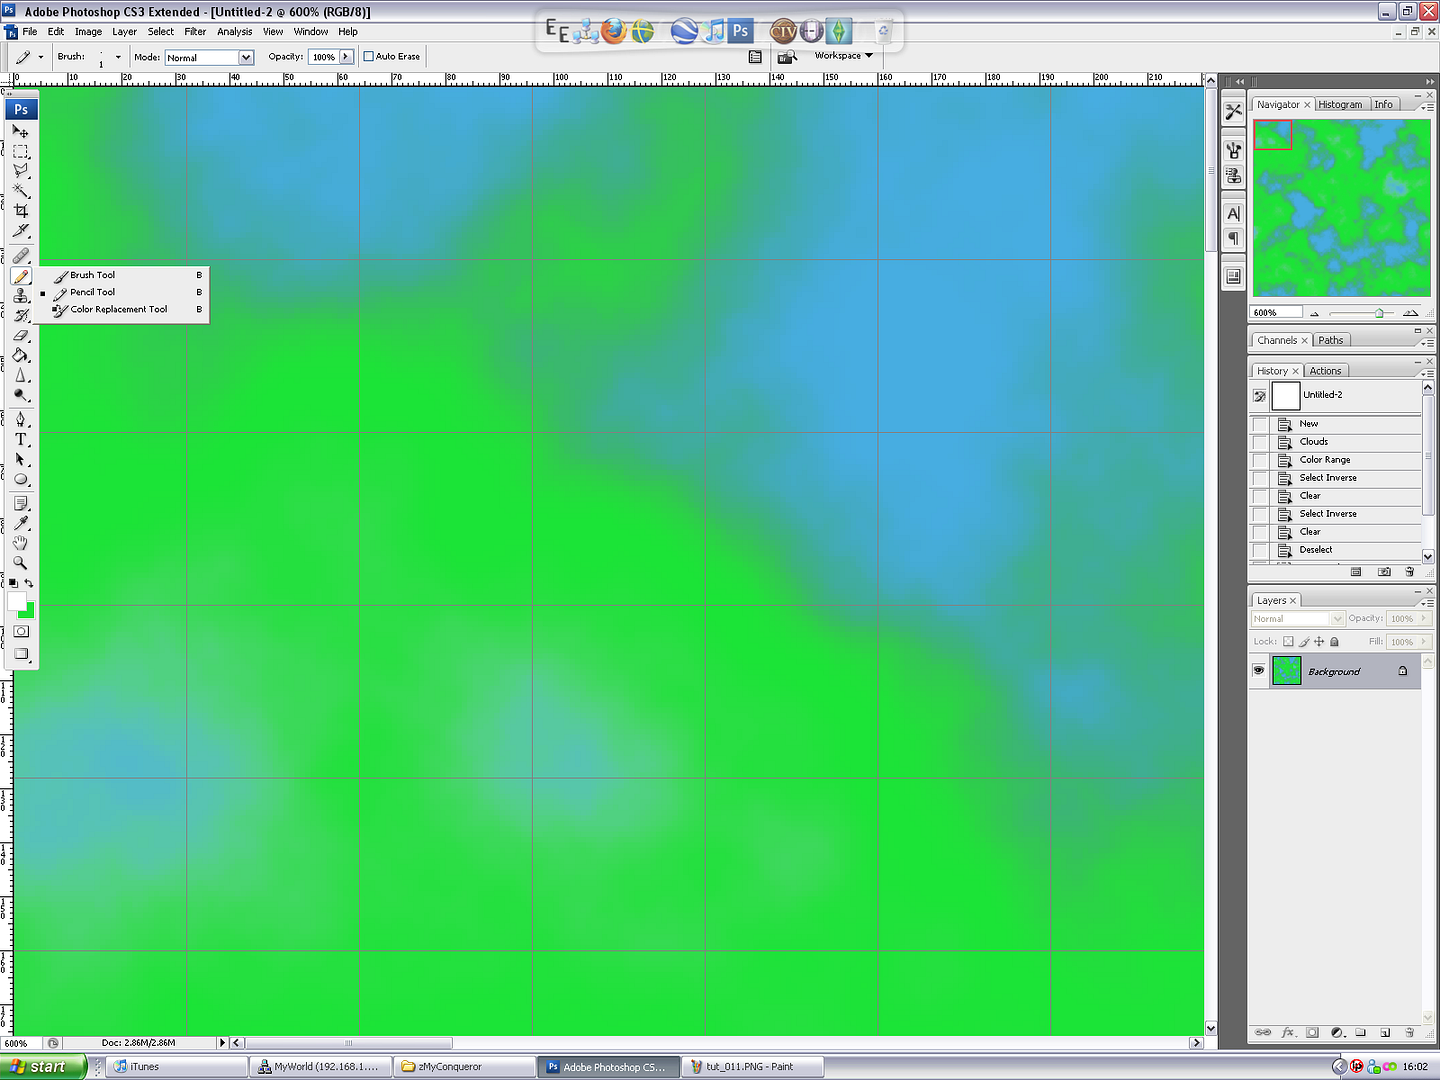Set the foreground color to what color you want the edge of the coast to be, depending on what sort of map you are making. I'll go with the basic colourful one, so, Black. Hit "Ok".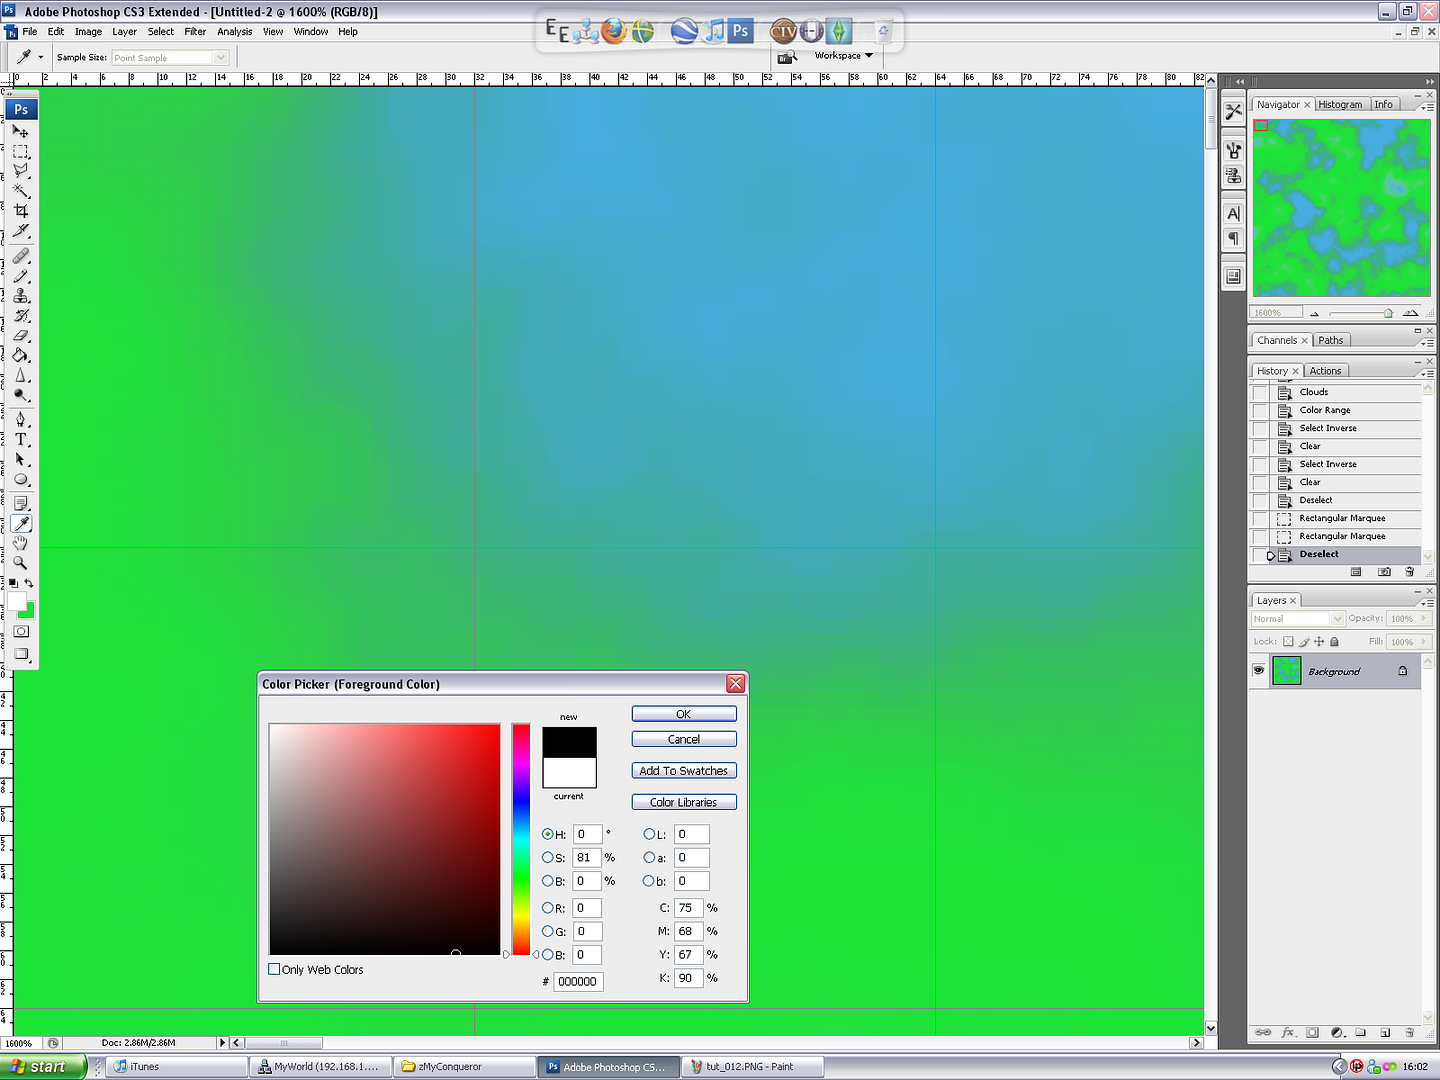Now, this part of the tutorial I made a mistake, and paid up by taking x5 longer than i should of to finish the entire process. Oops. What I forgot to do, is, make a new layer before moving on.So, do so. Make a new layer, and called in Coast Outline, or, something.Then, begind drawing around the edge of the land. Most of this goes by what you want your coast to look like, seeing as the edge between the green/blue is a fade, but I beleive this makes it more interesting. Gives you a little more freedom than otherwise, right? Anywho, go ahead and draw out the coast - Don't forget the islands and lakes! The more detail you put into this, the more interesting it will look.If your outlining is acting weird when you get near a grid line, acting as if it is magnetic, hit Shift + Ctrl + ;, which will turn off "Snap (to grid)".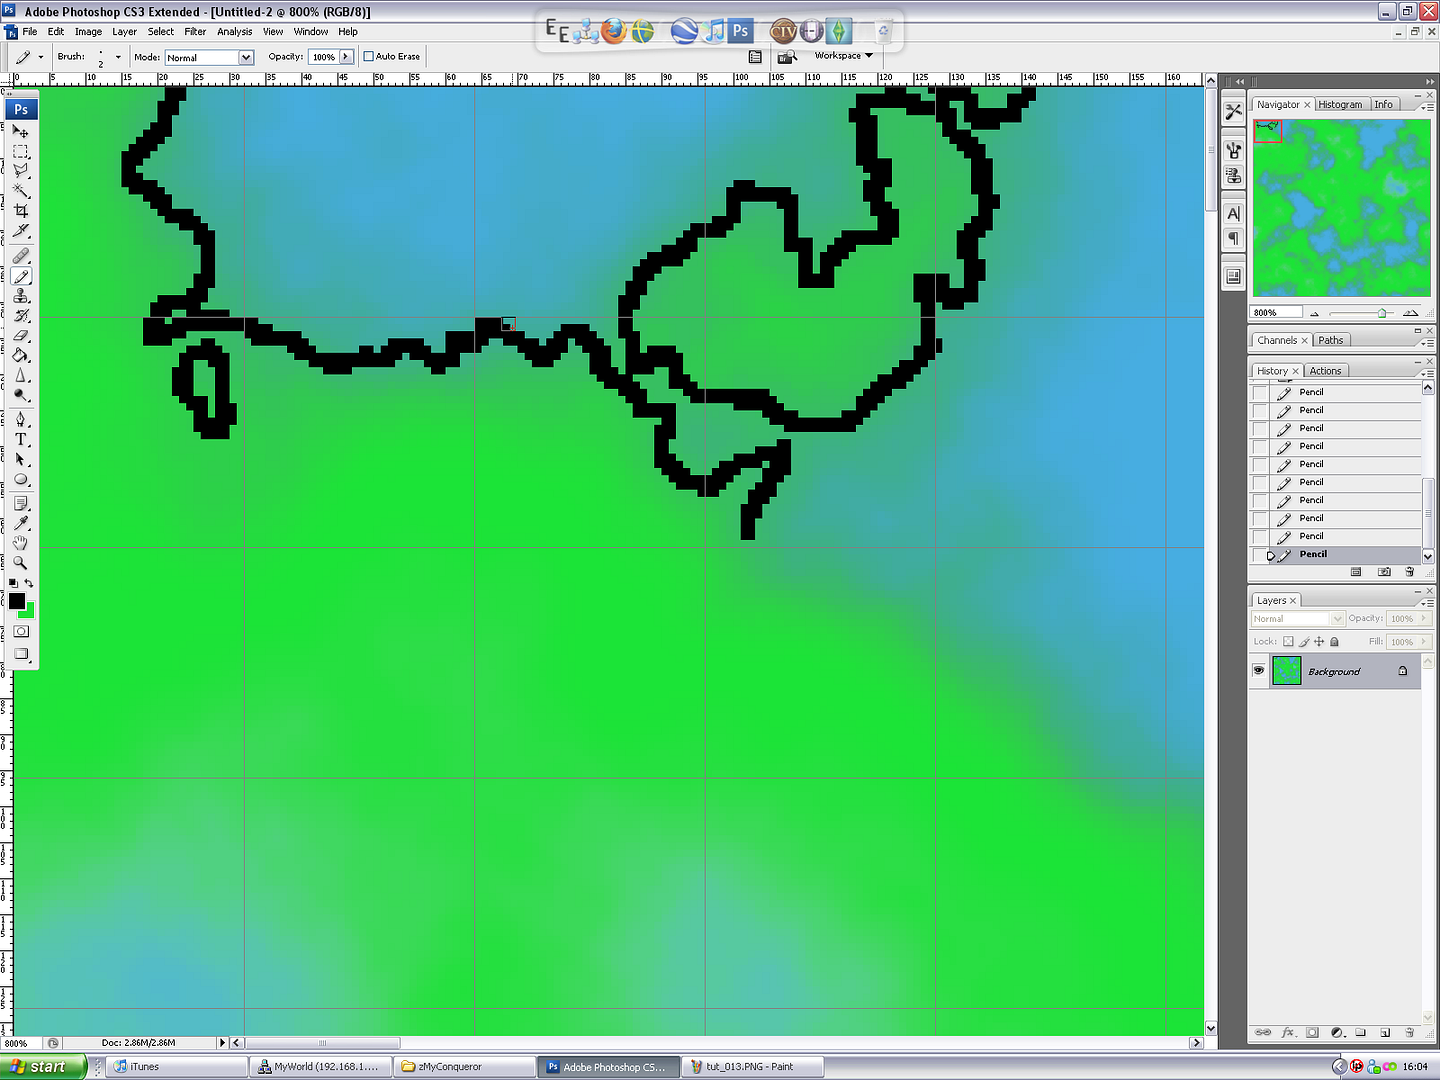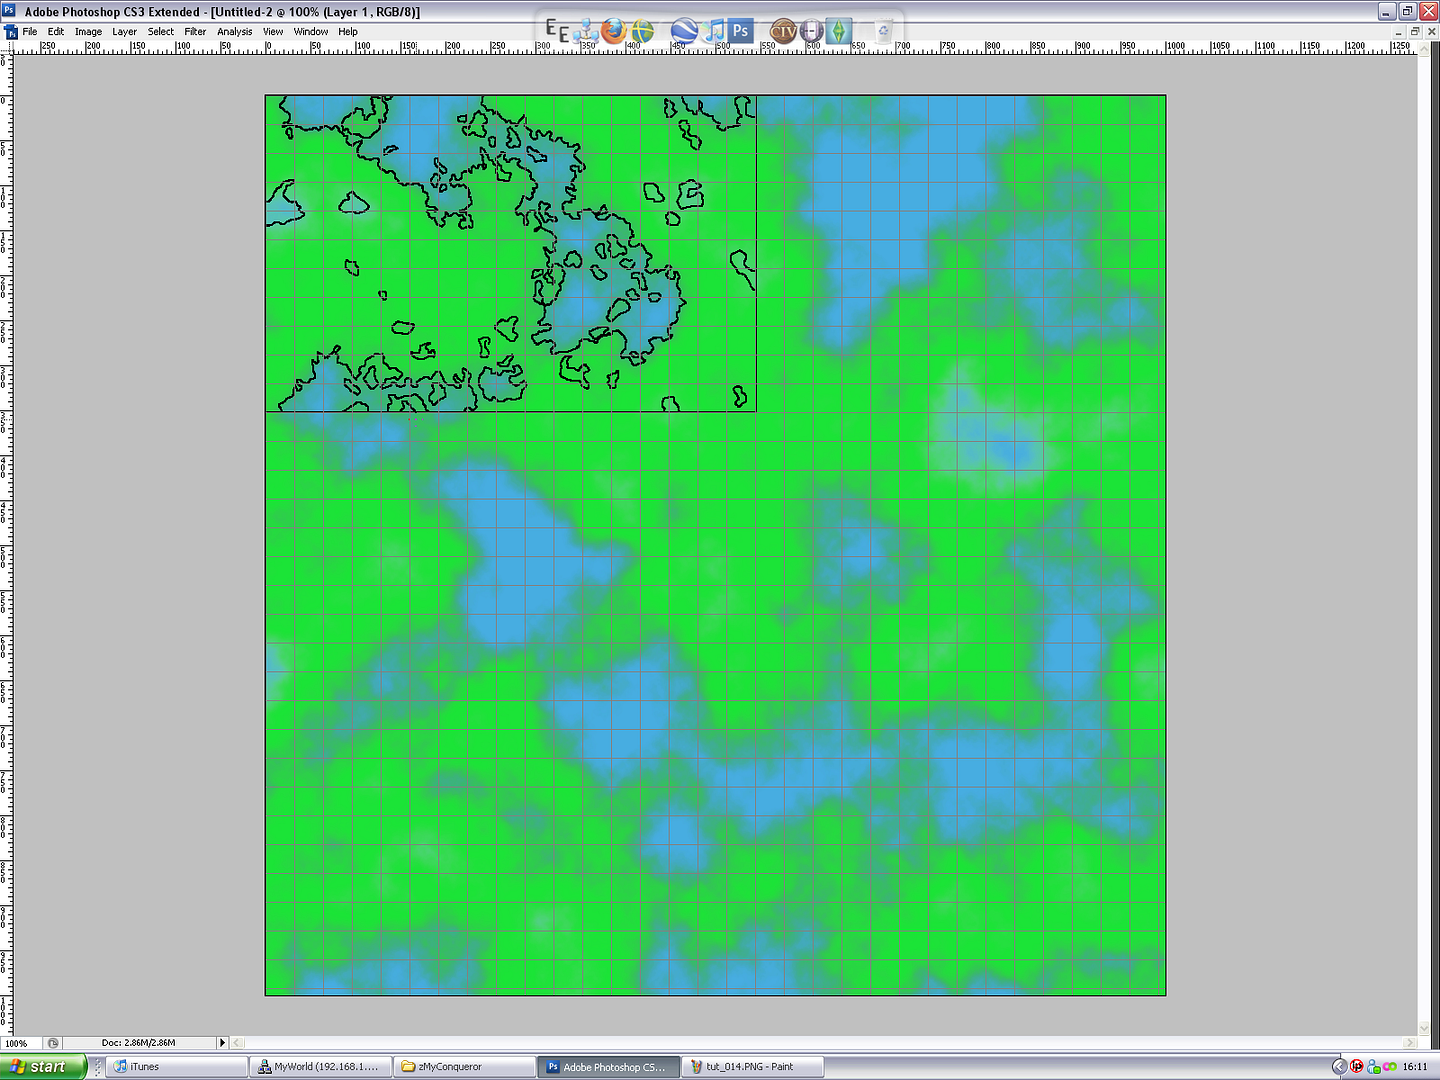**Part 7: And The Earth Riseth To Meet The Heavens…**Now for the mountains! Make a new layer, set your colours back to Black and White and do the Cloud Filter again.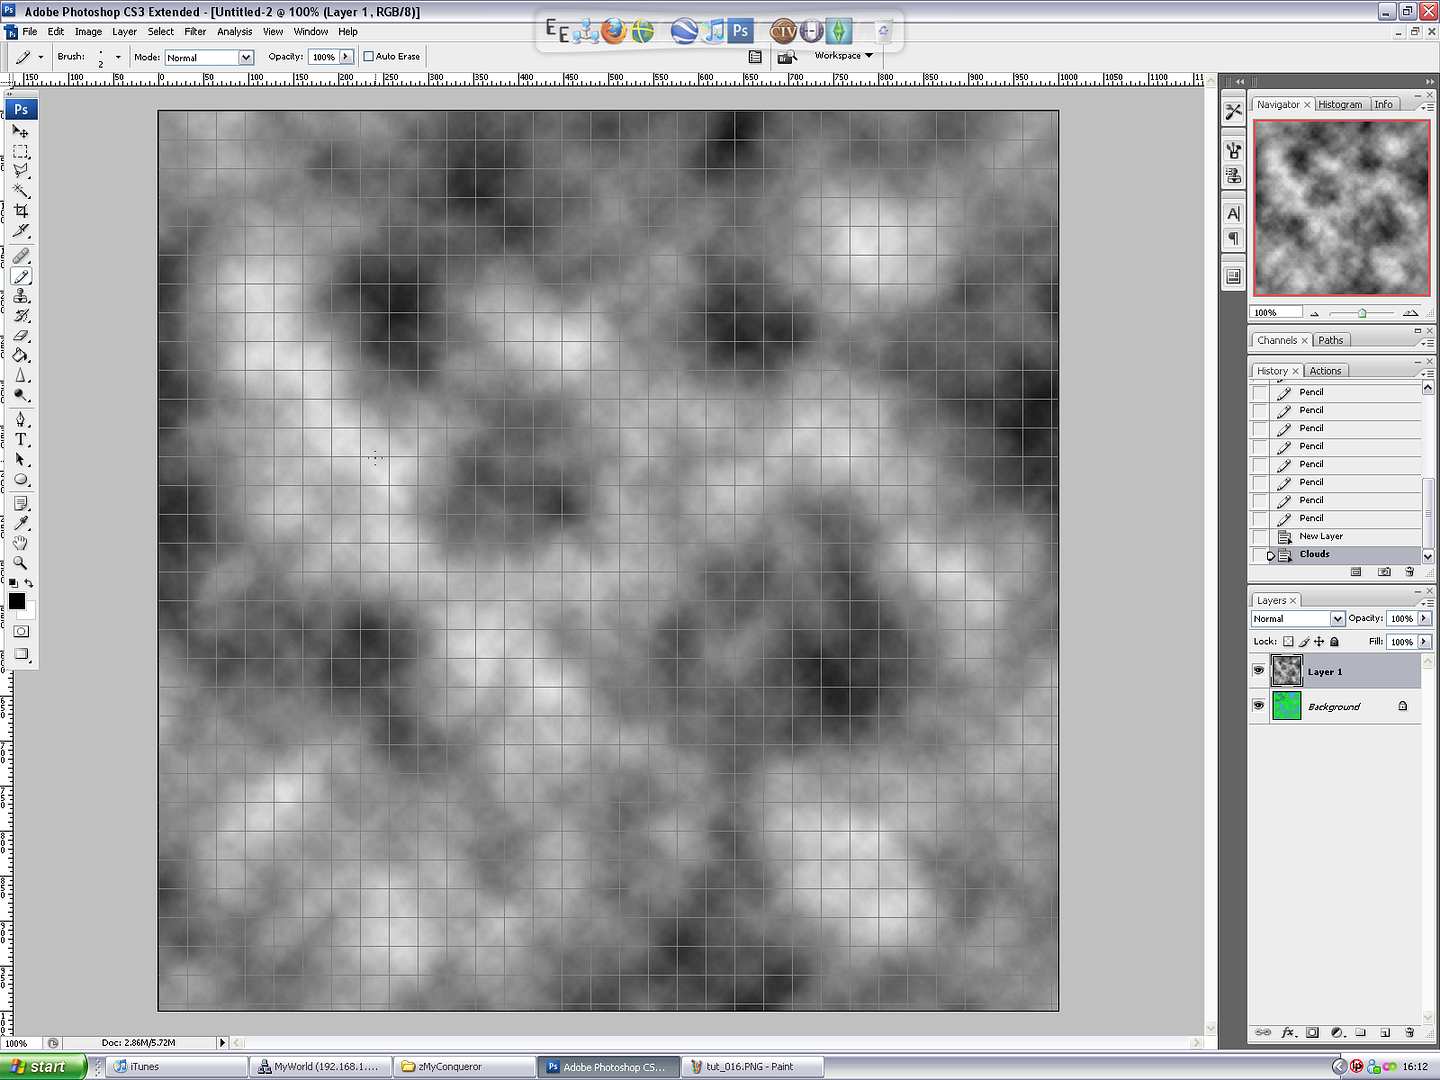Do a color selection again and try and get a veiny appearance, so, a fuzziness setting of 40-70.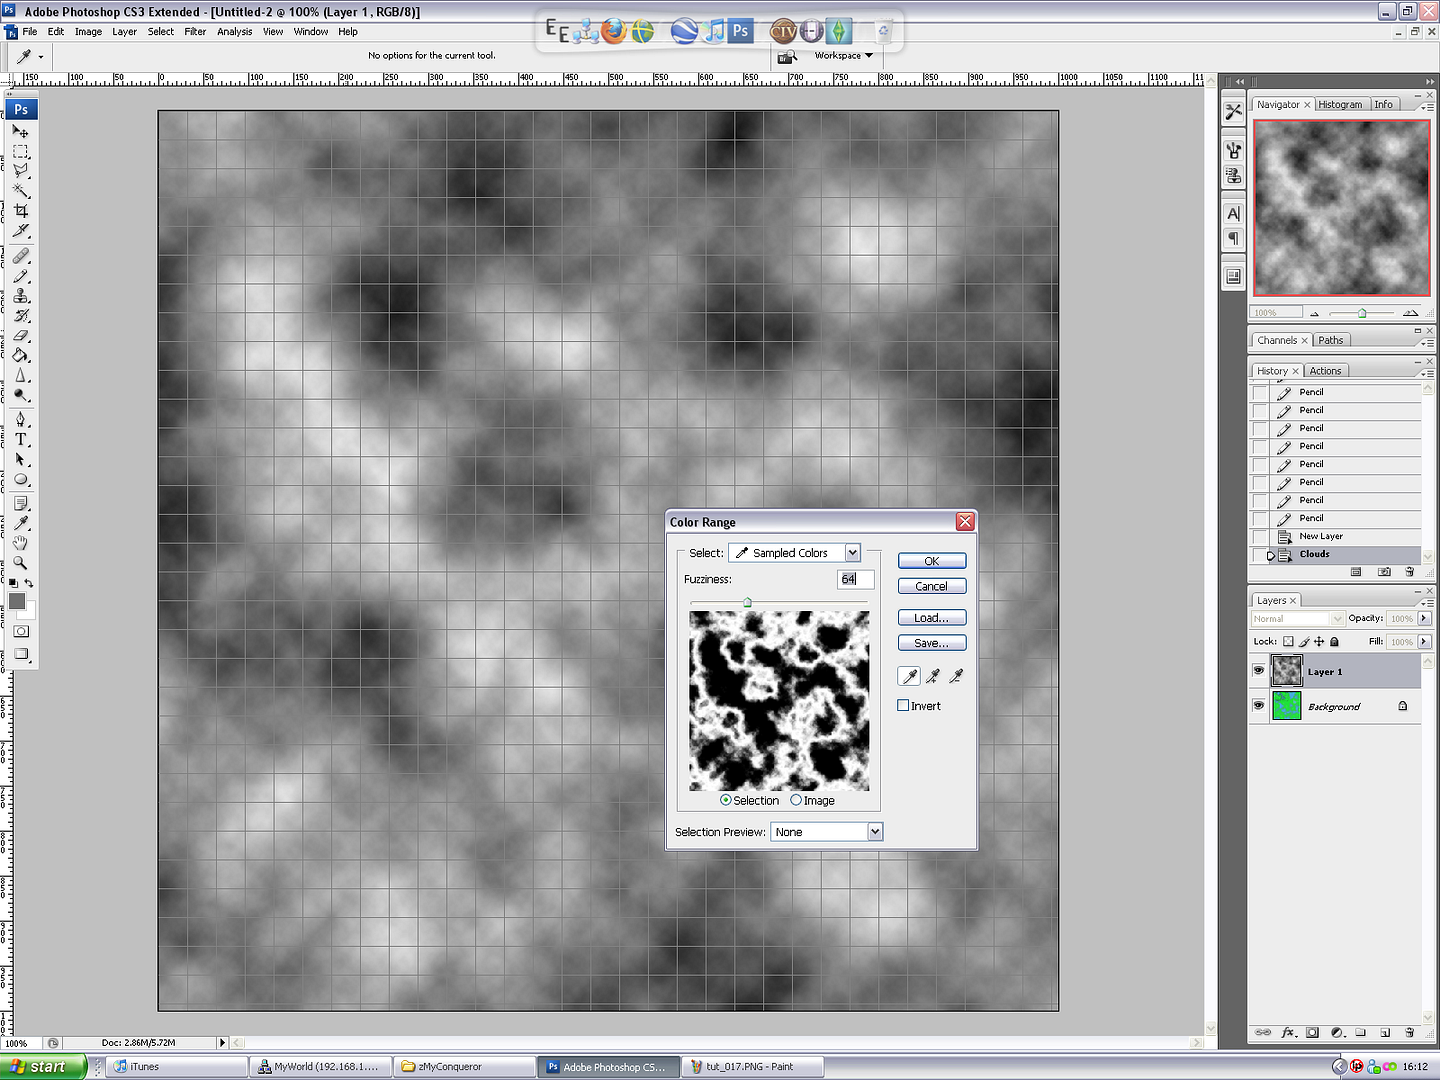Hit Delete.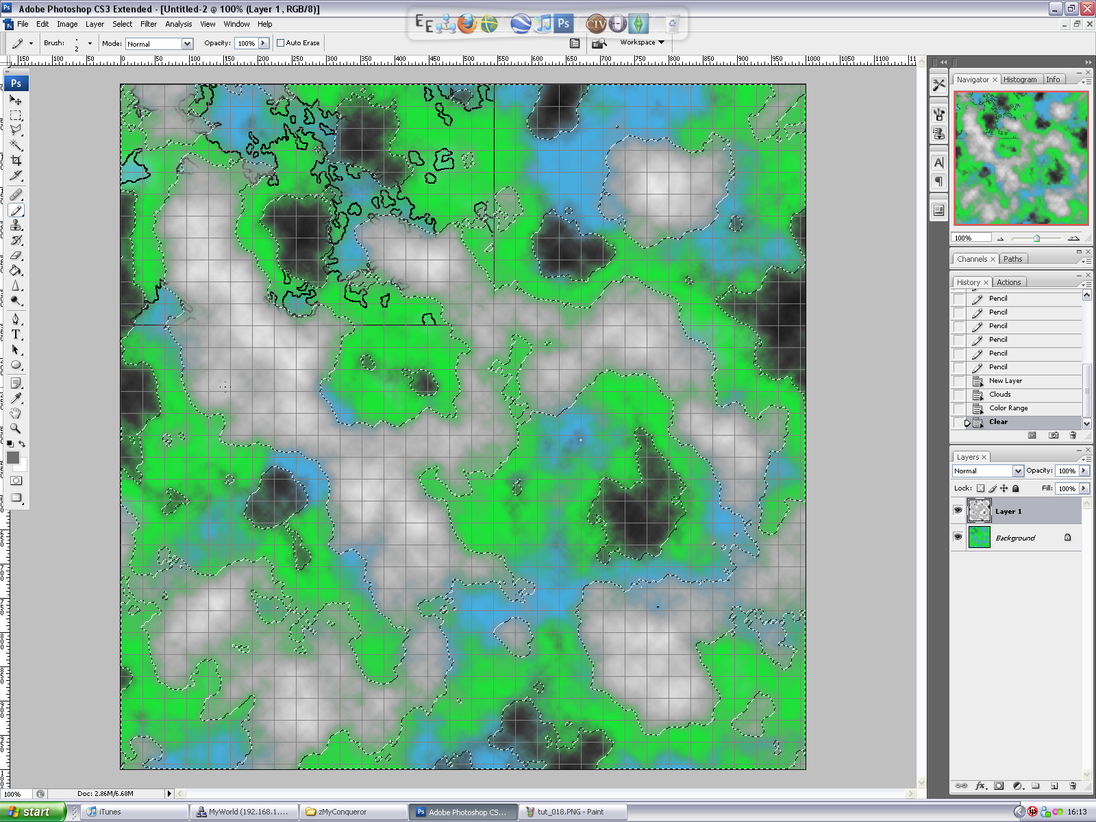Set your foreground color to a brown-mountainish colour.Invert your selection (File –> Select --> Invert) **or** (Ctrl + Shift + I)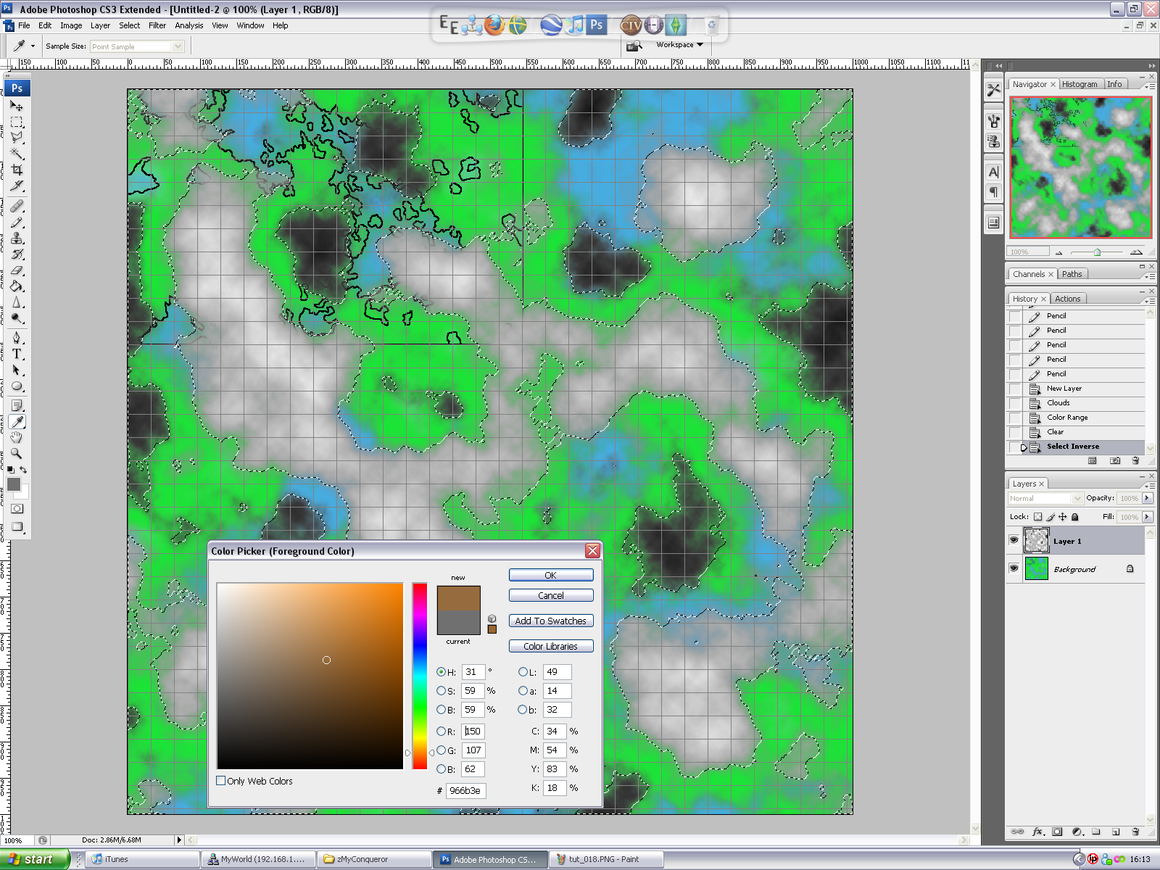Make a new layer, name it Mountains, then use the fill tool to fill it all in brown. Then right click the previous black/white cloud layer and Delete it.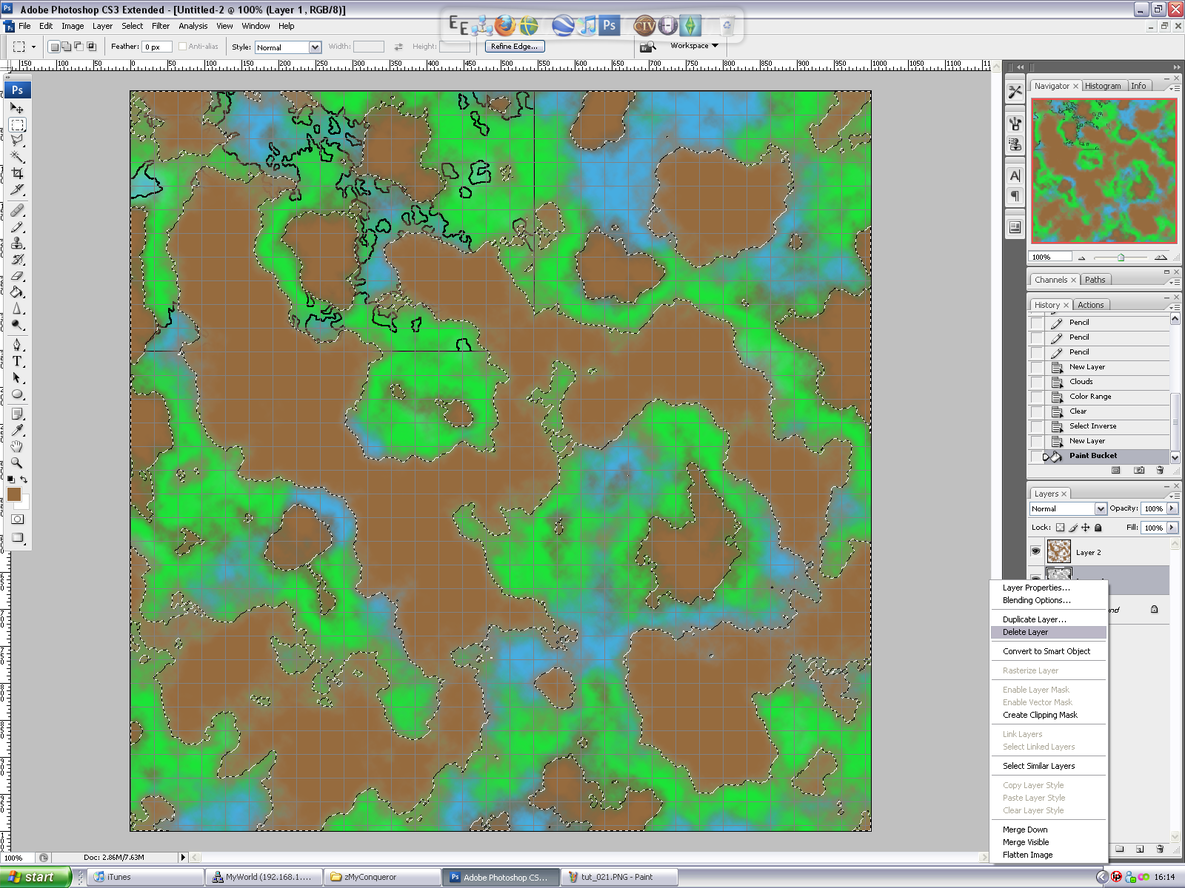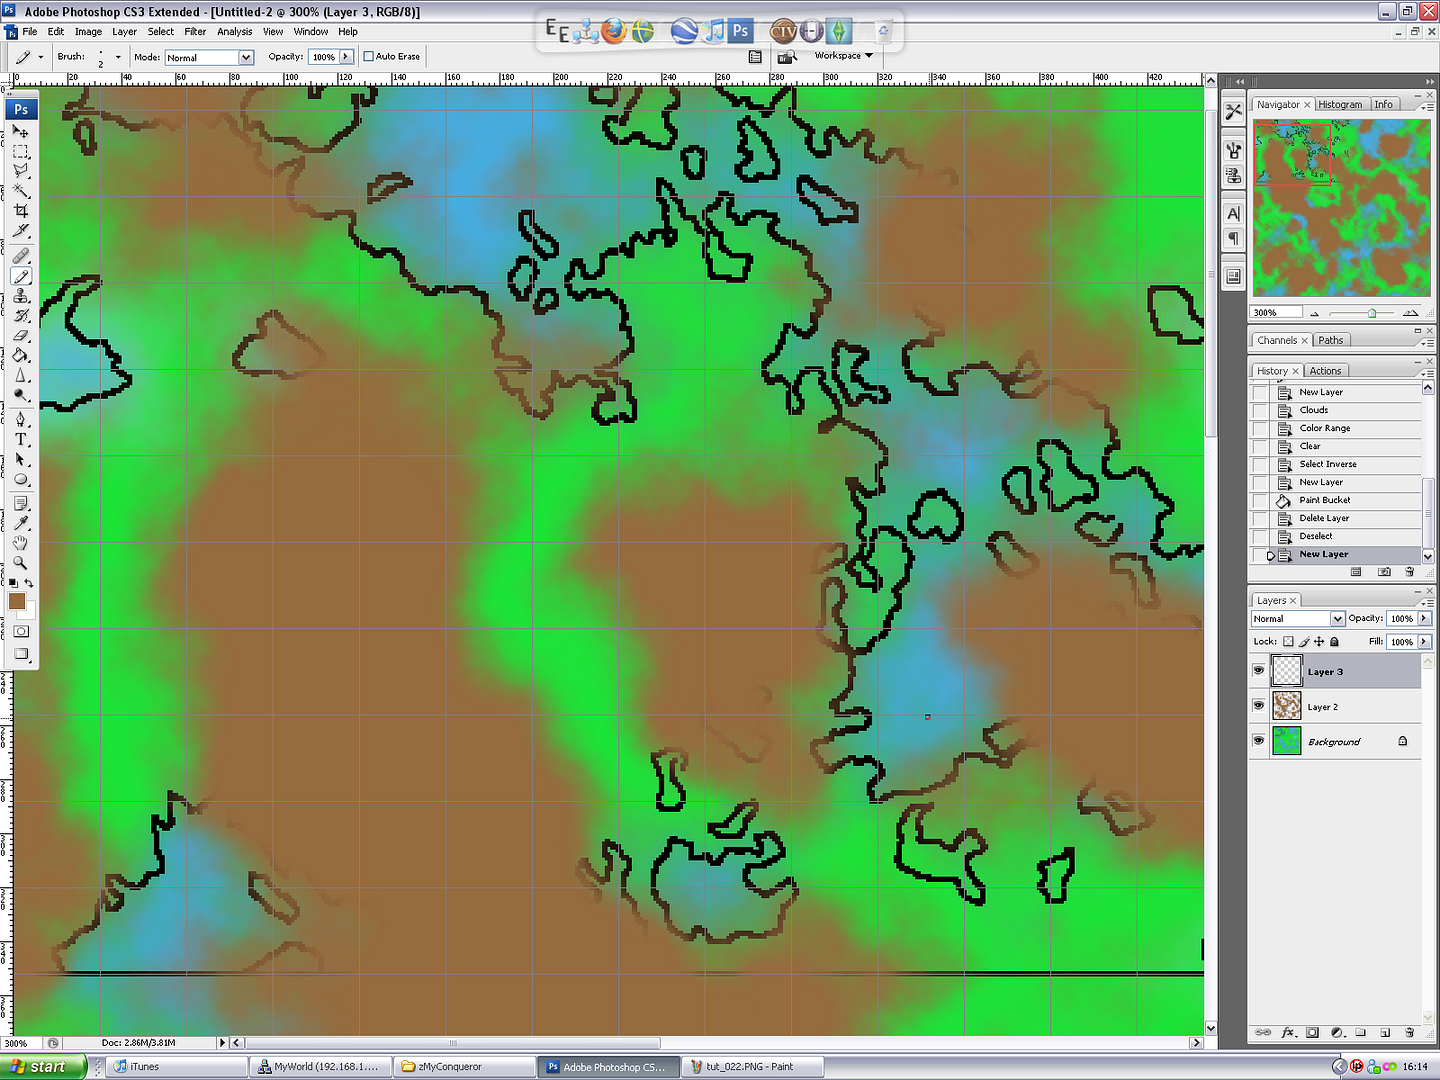Then, Click on the Eye on the Mountain Layer to hide the mountains.Do another color selection of the blue (sea), and set the fuzziness to 200.Click on where the eye was on the mountains layer, select the mountains layer… Then hit delete.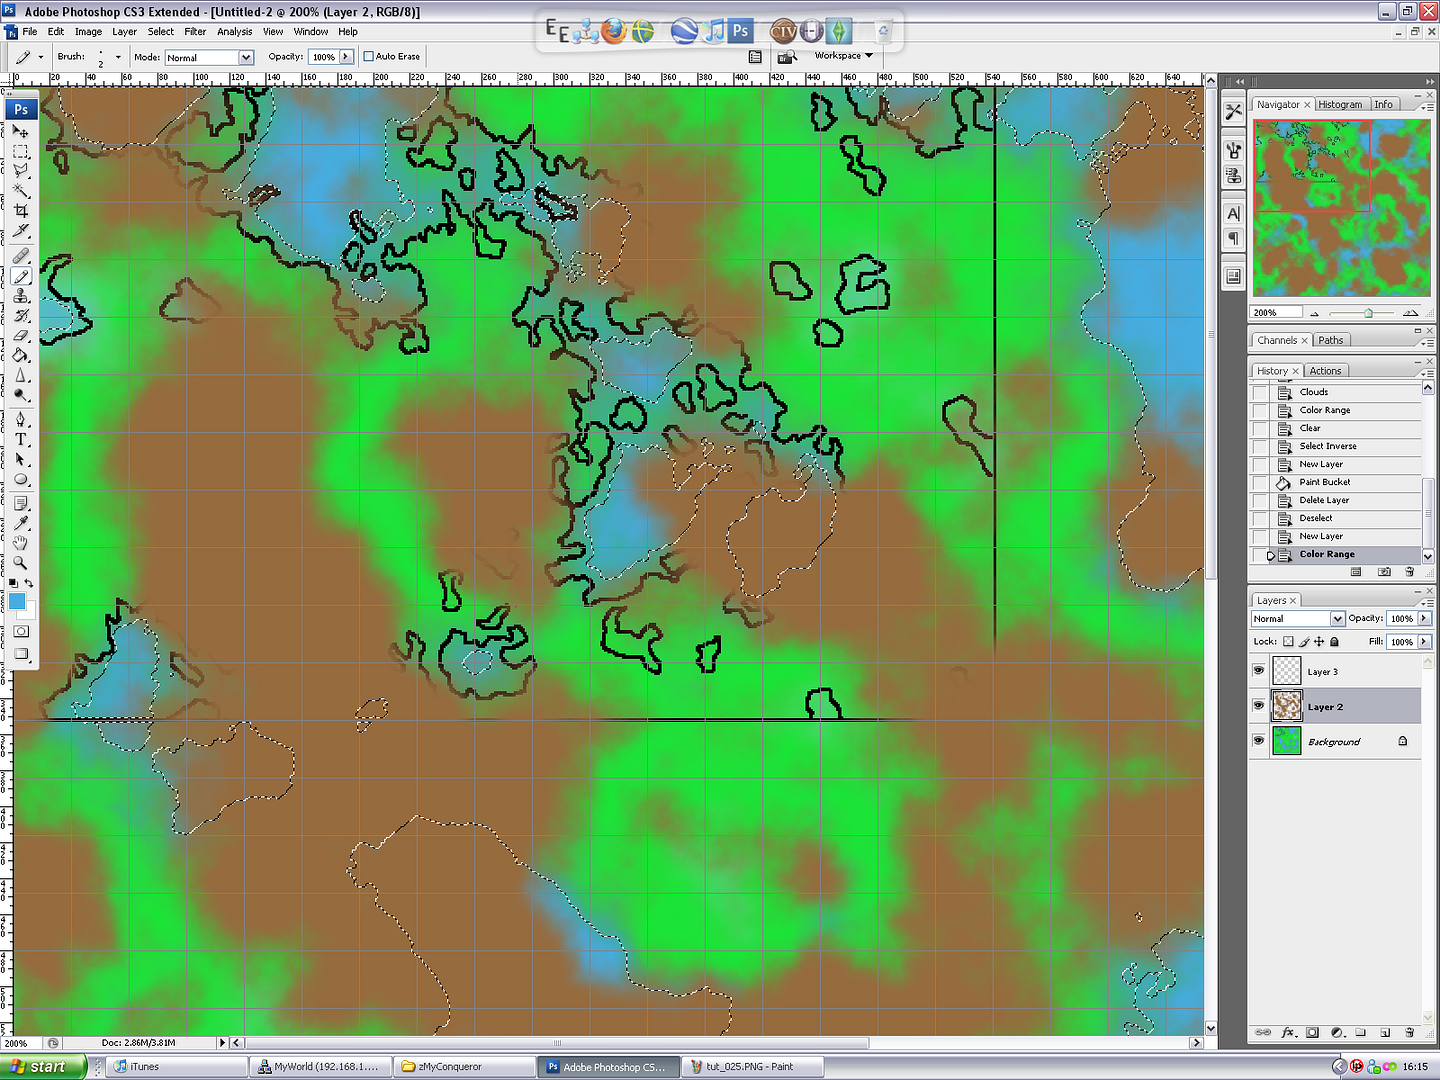This will delete any mountains that were in the sea (Mostly, at least).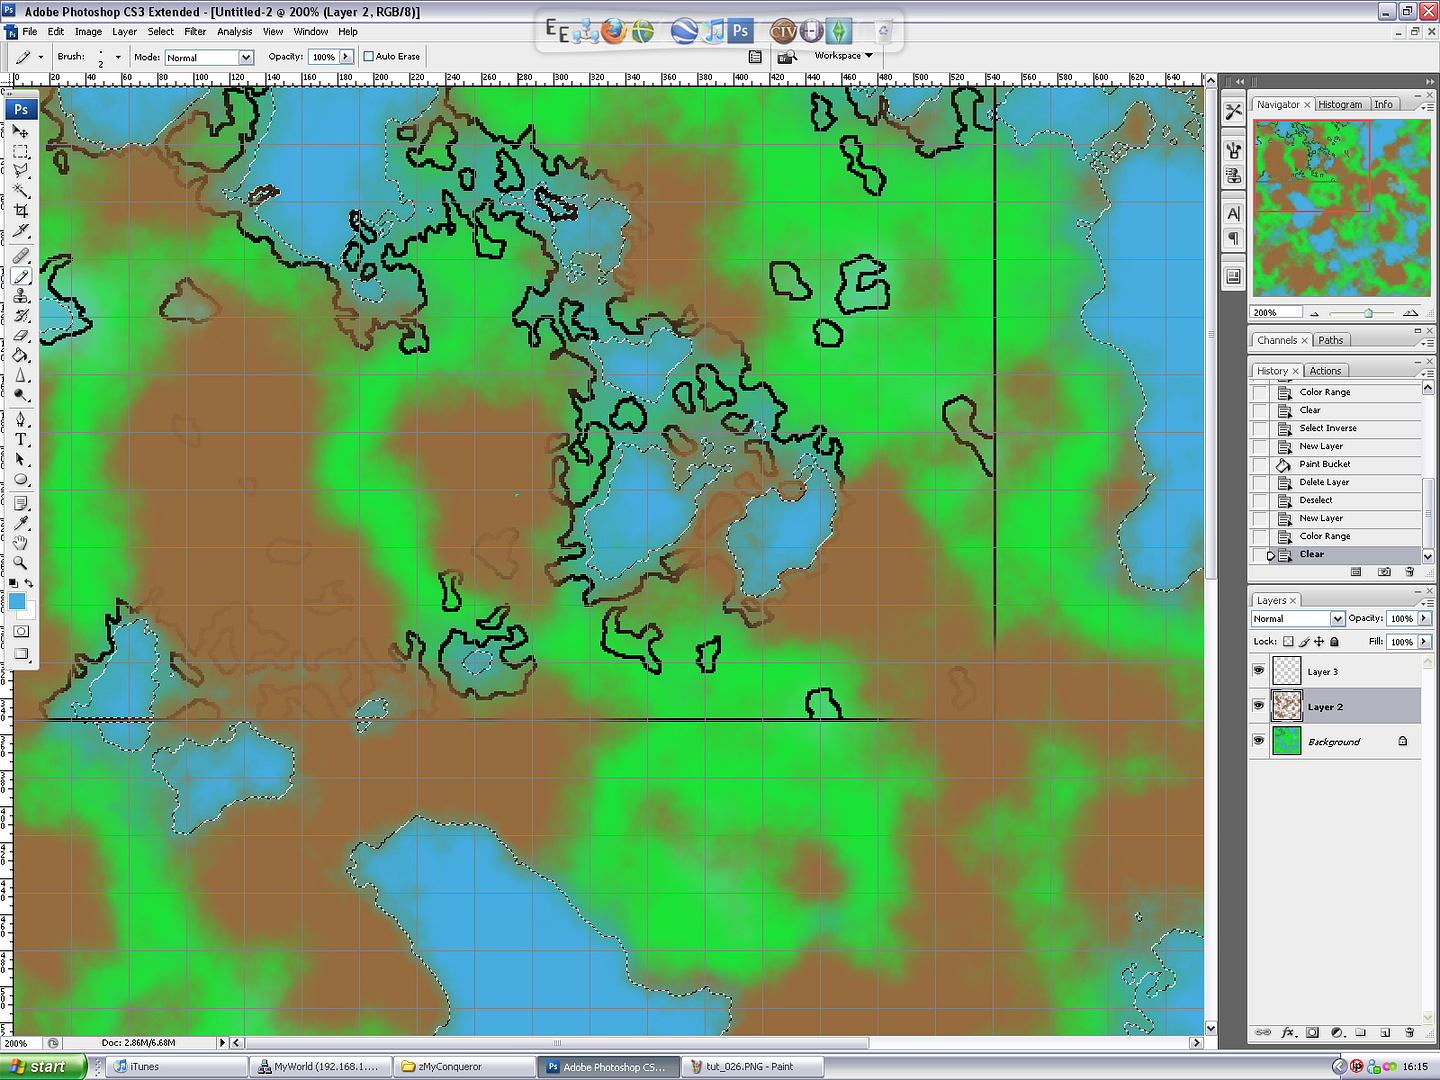Now, go make a new layer above the mountains and outline the brown as we did with the coast, using black as your pencil (Size 2) color.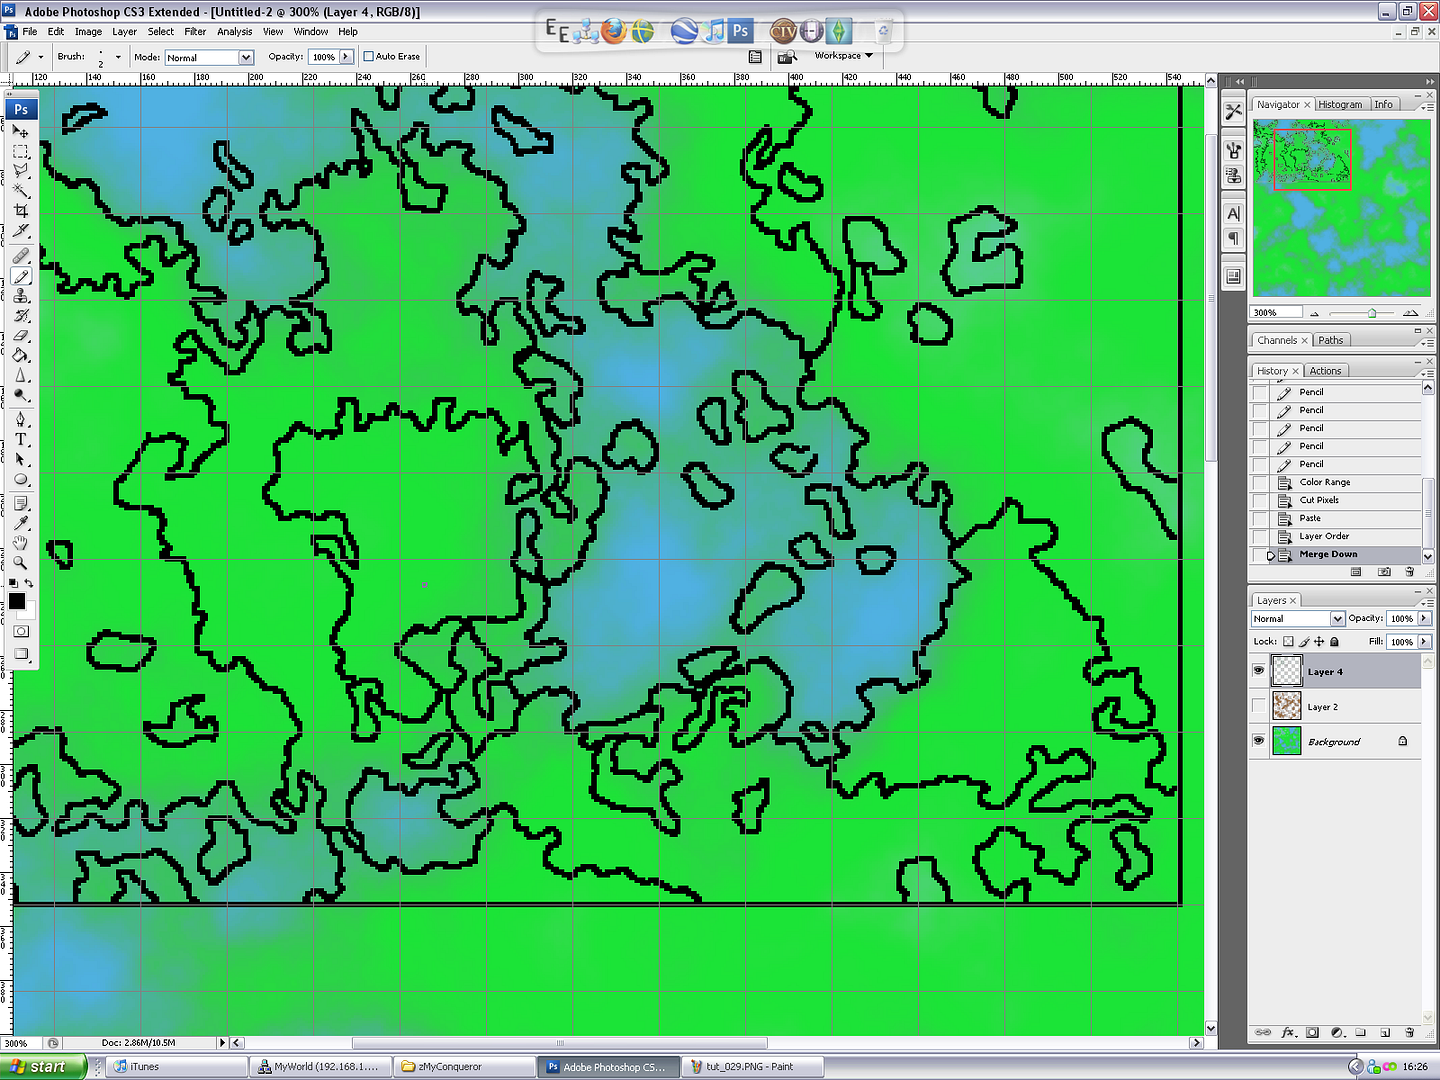Now, delete the mountains layer and make a new layer above the Mountains Outline layer. Use the Magic Wand tool (W) and select inside the Mountain Outline. Go back to the new layer above the outline, and fill it in.Then on the outline layer above the land and sea, fill in the sea where the seas are, and the land in where the land is - you should wind up with the below.**Step 8: Plant them trees!**Repeat the mountain process for the forests. But when you select the sea and delete the forest layer, also do the same with the mountains.**Step 9: Mapping a World Map**As I said above, you can use the grid as a guide for per-map. That is to say, one square = one map.This is how I design MyWorld's World Map.Sadly, I didn't discover the above process when crafting MyWorld's World Map, so it is rather distateful looking, but it is what we use now… I may use the above process for the second cont-... Oops. Said to much ;DAnyway, this gridlines aren't visible on the online version, but the Dark Squares are the maps we've completed thus far, and the numbers are the map numbers, useful for when handling a mass amount of Map Warps.**I hope this tutorial has been of use! Please upload and post any maps you make using this process, it will be interesting to see what other maps people have made using this process!! Also, any comments/suggestions are welcome! Viva l'eclipse!**~~Now to ask on the shoutbox how to slim my images down…~~ Link to comment Share on other sites More sharing options...
defendersdef Posted November 17, 2009 Share Posted November 17, 2009 image has been removedtry uploading it through eclipse Link to comment Share on other sites More sharing options...
azkanan Posted November 17, 2009 Author Share Posted November 17, 2009 That was odd. Why has this posted so early? I never hit submit. xDGoing to finish it up now, then. Link to comment Share on other sites More sharing options...
defendersdef Posted November 17, 2009 Share Posted November 17, 2009 lolz. anyways, good job on the tut. hope this will help out some newbs Link to comment Share on other sites More sharing options...
azkanan Posted November 17, 2009 Author Share Posted November 17, 2009 Yeah, Just gotta fix these images :P Link to comment Share on other sites More sharing options...
Akselj Posted November 17, 2009 Share Posted November 17, 2009 Looks awesome, I'll prolly try this out. Link to comment Share on other sites More sharing options...
greasontim Posted November 17, 2009 Share Posted November 17, 2009 i'll try this out and tell u if it works with Gimp as well seeing how its almost 100% like photoshop but free Link to comment Share on other sites More sharing options...
azkanan Posted November 17, 2009 Author Share Posted November 17, 2009 @greasontim:> i'll try this out and tell u if it works with Gimp as well seeing how its almost 100% like photoshop but freeI don't think Gimp has Color Select, does it? And something else somebody said was missing, something important..eh… Can't remember it. Oh well. (: Link to comment Share on other sites More sharing options...
defendersdef Posted November 17, 2009 Share Posted November 17, 2009 @Azkanan:> I don't think Gimp has Color Select, does it? And something else somebody said was missing, something important..eh… Can't remember it. Oh well. (:im pretty sure gimp does its just that… Link to comment Share on other sites More sharing options...
greasontim Posted November 17, 2009 Share Posted November 17, 2009 Fast Made (used normal start size)Made Black Top, White BottomFilter > Render > CloudsColour > Brightness-ContrastMagic Wand > Select Black areasColour > Colourize (edit till the black areas are blue)UnselectMagic Wand > Select White areasColour > Colourize (edit till the black areas are green)UnselectFilter > Render > CloudsMagic Wand > Areas you want as mountainsFill > BrownBasicly same thing not much of a different result[](http://www.freemmorpgmaker.com/files/imagehost/#2018ee20fc66a84633c83462f3275839.jpg) Link to comment Share on other sites More sharing options...
azkanan Posted November 17, 2009 Author Share Posted November 17, 2009 @greasontim:> Fast Made (used normal start size)> Made Black Top, White Bottom> Filter > Render > Clouds> Colour > Brightness-Contrast> Magic Wand > Select Black areas> Colour > Colourize (edit till the black areas are blue)> Unselect> Magic Wand > Select White areas> Colour > Colourize (edit till the black areas are green)> Unselect> Filter > Render > Clouds> Magic Wand > Areas you want as mountains> Fill > Brown> > Basicly same thing not much of a different result> > [](http://www.freemmorpgmaker.com/files/imagehost/#2018ee20fc66a84633c83462f3275839.jpg)- Link to comment Share on other sites More sharing options...
greasontim Posted November 17, 2009 Share Posted November 17, 2009 i did it quickso yeah its useable Link to comment Share on other sites More sharing options...
azkanan Posted November 17, 2009 Author Share Posted November 17, 2009 There's no detail in the GIMP version… The coast is smooth and undetailed, it's all just circles. I guess it could be used as a base form, but, that's about it...Photoshop wins in any case. Link to comment Share on other sites More sharing options...
azkanan Posted December 19, 2009 Author Share Posted December 19, 2009 Bump, for epicity. Link to comment Share on other sites More sharing options...
azkanan Posted December 22, 2009 Author Share Posted December 22, 2009 So! I just spent the last 7 hours, that's right, 7 hours -straight-, working up a new World Map for my game, MyWorld, using the above process. Came out pretty useful!White fade top left is the snow regions, green centre-bottom is a kingdom I need to remember.Full Sized Image found **[Here](http://img.photobucket.com/albums/v229/azkanan/worldmap-2.jpg)** Link to comment Share on other sites More sharing options...
Ice - Fire Posted December 23, 2009 Share Posted December 23, 2009 awsome map! nice tut guess ill have to go buy photoshop now Link to comment Share on other sites More sharing options...
xelander Posted December 28, 2009 Share Posted December 28, 2009 I'd love to ty but I don't got any money to buy photoshop. xDOtherwise a nice tutorial. Link to comment Share on other sites More sharing options...
azkanan Posted June 17, 2011 Author Share Posted June 17, 2011 Came across this in my old posts.It's a pretty well-made tutorial, for a pretty fail-safe way of making as pretty decent base map.Thought I'd necro it, for that. Link to comment Share on other sites More sharing options...
Doodman Posted June 20, 2011 Share Posted June 20, 2011 Niiiiiice will try this out when i need a world mapAlso theres an outlining effect in photoshop that you can download so you dont have to do it manuallyI dont have the specific link since i dl'd it a long time ago but I originally found it just by googling photoshop brushesIt allwos you to set the color, width of the outline, and the amount you want to fade the outline into transparency. Link to comment Share on other sites More sharing options...
azkanan Posted June 20, 2011 Author Share Posted June 20, 2011 @Doodman:> Niiiiiice will try this out when i need a world map> > Also theres an outlining effect in photoshop that you can download so you dont have to do it manually> I dont have the specific link since i dl'd it a long time ago but I originally found it just by googling photoshop brushes> > It allwos you to set the color, width of the outline, and the amount you want to fade the outline into transparency.Layer Filters > Stroke.I just find it more… what's the word... Earning from the experience... to do it by hand. Link to comment Share on other sites More sharing options...
Drummerpete Posted June 20, 2011 Share Posted June 20, 2011 @Azkanan:> Layer Filters > Stroke.> > I just find it more… what's the word... **rewarding**… to do it by hand. Link to comment Share on other sites More sharing options...
azkanan Posted June 21, 2011 Author Share Posted June 21, 2011 @Peteyyy:> Layer Filters > Stroke.> > I just find it more… what's the word... rewarding... to do it by hand. Link to comment Share on other sites More sharing options...

Recommended Posts
Create an account or sign in to comment
You need to be a member in order to leave a comment
Create an account
Sign up for a new account in our community. It's easy!
Register a new accountSign in
Already have an account? Sign in here.
Sign In Now