

zerohero
-
Posts
199 -
Joined
-
Last visited
Never
Content Type
Profiles
Forums
Calendar
Everything posted by zerohero
-
@or3o: > I did the tutorial and i have to say it works great. i was just wondering if there is a reletivly simple way to adjust my light radius? like i could make it so items add to my light radius? Heya or3o, try ajusting ``` Public Const LIGHT_MAXSTEPS As Long = ``` The higher the number the greater the tile light radius and vice versa. Hope this helps.
-
Add an extra ``` End If ``` To the end of his code, should fix you right up
-
@Deathbeam: > I think more light than one cant be done via this metod i tried it and i chached them like sound tiles but it just dont work, rendering will overlay That is exactly right, this method of rendering is not really suited for many light sources, however I believe it can be adapted and change to do so.. which is what I am looking into. The easiest and most effective form of lighting would defiantly be the dx8 lighting protocalls themselves, but I am still unsure how to use them in the game environment yet.
-
**[EO 3.0] Tile based simulated lighting system 1.0** This is the very first revision for a project which I intent to carry on improving and adjusting to become far more powerful than it currently is. In short this is a slightly revised version of **DeathBeams** CS:DE script and all credit goes to him for his hard work. This is currently tested and fully 3.0 (nightly compatible). The final result will be simular to this >! 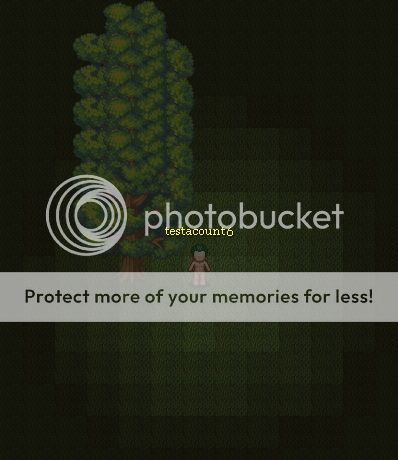 So what are we waiting for? Lets begin! **All modifications will be client side only** Open up the '**ModGlobals**' module and at the very bottom add ``` ' Light emitter Public Const LIGHT_MAXSTEPS As Long = 8 Public Const LIGHT_BEGIN As Long = 255 Public Const LIGHT_END As Long = 50 Public Const AlphaThreshold As Long = 70 ``` **Change** The **AlphaThreshold** variable to the alpha amount that you want the light source to kick in at (this is set via the map properties) . I am currently using a threshold of 70 in my project. Ok now open up your '**ModGameLogic**' Module and at the very bottom add this function ``` Public Function CalcVertexBrightness(LightX As Long, LightY As Long, VertexX As Long, VertexY As Long) Dim x1 As Long, x2 As Long, y1 As Long, y2 As Long, distance As Double, LightSteps As Long Dim lXDistance As Long Dim lYDistance As Long Dim lDistance As Long Dim lVertexDistance As Long Dim lDistanceNormal As Long Dim lLightSteps As Long x1 = ConvertMapX(LightX * 32) + 8 y1 = ConvertMapY(LightY * 32) + 8 x2 = VertexX y2 = VertexY lDistanceNormal = CLng(Sqr((PIC_X / 2) ^ 2 + (PIC_Y / 2) ^ 2)) '// Calculate distance from vertex lXDistance = CLng(Abs(x1 - x2)) lYDistance = CLng(Abs(y1 - y2)) lVertexDistance = CLng(Sqr(lXDistance ^ 2 + lYDistance ^ 2) / lDistanceNormal) If lVertexDistance textureHeight Then Exit Sub If sX + sWidth > textureWidth Then Exit Sub If sX < 0 Then Exit Sub If sY < 0 Then Exit Sub For x = 0 To 3 Box(x).RHW = 1 Box(x).Color = Color Next Box(0).x = dX Box(0).y = dY Box(0).tu = (sX / textureWidth) Box(0).tv = (sY / textureHeight) Box(1).x = dX + dWidth Box(1).tu = (sX + sWidth + 1) / textureWidth Box(2).x = Box(0).x Box(3).x = Box(1).x Box(2).y = dY + dHeight Box(2).tv = (sY + sHeight + 1) / textureHeight Box(1).y = Box(0).y Box(1).tv = Box(0).tv Box(2).tu = Box(0).tu Box(3).y = Box(2).y Box(3).tu = Box(1).tu Box(3).tv = Box(2).tv Direct3D_Device.SetTexture 0, gTexture(TextureNum).Texture Direct3D_Device.DrawPrimitiveUP D3DPT_TRIANGLESTRIP, 2, Box(0), FVF_Size End Sub ``` Ok now it is time to start drawing the player light! Open up your '**ModGraphics**' module once more and search for ``` Public Sub DrawMapTile(ByVal x As Long, ByVal y As Long) ``` Within this sub, directly underneath - ``` ' Draw normally RenderTexture Tex_Tileset(.Layer(i).Tileset), ConvertMapX(x * PIC_X), ConvertMapY(y * PIC_Y), .Layer(i).x * 32, .Layer(i).y * 32, 32, 32, 32, 32, -1 ``` **Add** The following code - ``` If CurrentTintA > AlphaThreshold Then RenderPlayerLight Tex_Tileset(.Layer(i).Tileset), ConvertMapX(x * PIC_X), ConvertMapY(y * PIC_Y), .Layer(i).x * 32, .Layer(i).y * 32, 32, 32, 32, 32, -1 End If ``` What this does is tells our game engine to render the light between the ground and mask layer, meaning it will not render on top of the fringe layers, you can change this if you wish. Believe it or not but you are now done! Open up your admin panel, map editor and then hit properties. Set the RGB values of the map all to 1 and increase the alpha amount above your threshold and the lighting should kick it! The final result should be something like this, note how the light does not overlap the fringe elements, user interface or anything else it should not-  ***some notes*** The line ``` CurrentTintA + Abs(255 - CurrentTintA) / 2 ``` Is completely subjective to my game environment, meaning it may not have a good effect in yours. Try playing with these numbers to find what is best for you. I would also recommend that anyone wishing to use this extensively should think bout added map moral checks, so that the lighting responds differently for example to indoor v outdoor environments. I will try and update this with any progress I make on the subject. Please remember this is Deathbeams concept that I have just modified for better uses.
-
The GiveInvItem piece of code I intended to be untouched so it sat just under where you pasted the code that takes the required items. I just installed this in a fresh copy of eclipse and it works perfectly so perhaps you have missed something out Prince, did you apply the updates correctly?
-
@vinyl: > This topic is for Q&A's Technically he is asking a question that can be answered, so instead of posting a useless objective statement why not just post something constructive? In my opinion the first one is better, however they both look very generic and 'basic' I must say. You defiantly need some foliage and minor details in there if you ever wish to separate your mapping skills from that of everyone else's on these forums. Personally I'm not a huge fan of making spaces that users cannot reach. Why not get rid of the small cliff entirely and create a cave or something interactive, but now Im going off point. Its good, but could.. and probably should be a hell of allot better if you wish to distinguish yourself.
-
~~Initially nothing, I converted it to 3.0 drawing method standards and I was getting draw textures with colour changing but could not figure out how to convert them to colours.~~ *edit* got it working in 3.0, now just need to find a way to stop GUI from being 'darkened' will post back when I have. *edit 2* I now have it working fully within 3.0, the changes where relatively straight forward however your system did have a few holes that needed filling. The code will now check map moral to make sure the area is not indoors, and if it is react differently. I have also added a threshold so that the light source will only take effect when the alpha on the map is at a user set level, meaning during the day the light is not emitted. It took literally an hour for me to figure out where exactly the 'light' was being drawn from haha, what a fun time that was. Anyway I will try and compile the revised version and either make a new thread or merge it here with Deathbeams if he does not mind.
-
Tried to get this working in 3.0 but to no current success. I am sure its possible but obviously I'm doing something wrong. If anyone does manage to get it working with the same results please let me know.
-
If you are using eclipse 2.0 then http://www.touchofdeathforums.com/smf2/index.php/topic,67409.0.html If 3.0 nightly than use this as a reference - http://www.touchofdeathforums.com/smf2/index.php/topic,81380.0.html
-
Well ReOrderChat only has two parameters so I think that's one of your problems. Unrecoverable dx8 issues commonly are missing graphic files, however if your case its this line ``` RenderText Font_Default, Camera.Left + 10, (Camera.Bottom - 20) - (i * 20), Chat(i).text, color, 0 ``` The second parameter where you have define camera.left is where your text string should be, example - ``` RenderText Font_Default,"your text should be here silly", Camera.Left + 10, (Camera.Bottom - 20) - (i * 20), Chat(i).text, color, 0 ``` Also your - ``` Public Sub DrawChat() ``` Has no variables to actually draw the string from so unless you have a global variable that contains the text string you want to draw that will need fixing too.
-
First you must create a texture for the faces you plan to add in, something like tex_faces() As Long Then you must create a sub to check the directory of the faces and create the file index, such as - ``` Public Sub CheckFaces() Dim i As Long ' If debug mode, handle error then exit out If Options.Debug = 1 Then On Error GoTo errorhandler i = 1 NumFaces = 1 ReDim Tex_Face(1) While FileExist(GFX_PATH & "Faces\" & i & GFX_EXT) ReDim Preserve Tex_Face(NumFaces) NumTextures = NumTextures + 1 ReDim Preserve gTexture(NumTextures) Tex_Face(NumFaces).filepath = App.Path & GFX_PATH & "faces\" & i & GFX_EXT Tex_Face(NumFaces).Texture = NumTextures NumFaces = NumFaces + 1 i = i + 1 Wend NumFaces = NumFaces - 1 If NumFaces = 0 Then Exit Sub For i = 1 To NumFaces LoadTexture Tex_Face(i) Next ' Error handler Exit Sub errorhandler: HandleError "CheckFaces", "modDatabase", Err.Number, Err.Description, Err.Source, Err.HelpContext Err.Clear Exit Sub End Sub ``` Then one the faces are indexed you can call upon and draw them like this ``` Direct3D_Device.Clear 0, ByVal 0, D3DCLEAR_TARGET, D3DColorRGBA(0, 0, 0, 0), 1#, 0 Direct3D_Device.BeginScene With rec .Top = 0 .Bottom = 100 .Left = 0 .Right = 100 End With With rec_pos .Top = 0 .Bottom = 100 .Left = 0 .Right = 100 End With RenderTextureByRects Tex_Face(faceNum), rec, rec_pos With srcRect .x1 = 0 .x2 = frmMain.picFace.Width .y1 = 0 .y2 = frmMain.picFace.Height End With Direct3D_Device.EndScene Direct3D_Device.Present srcRect, srcRect, frmMain.picFace.hwnd, ByVal (0) ``` Hope this helps
-
Press the enter key to pick up items.
-
@Prince: > If i set the price of the item in the shop. ex : 1x Stone For 100 Gold ( Gold Type Set to Currency ) > When i buy, it doesn't reduce the amount of the Gold in my inventory also doesn't receive the Stone too, and the message says " Trade Success ". > > But If I Set the Gold Type to none. It working fine. Sorry I have now updated the tutorial, it should be fully functional. For those who has already implemented this system there is a quick guide of the things that need changing - Add both these functions in **ModPlayer** (server side) ``` Function HasItemamount(ByVal index As Long, ByVal itemnum As Long) As Long Dim i As Long ' Check for subscript out of range If IsPlaying(index) = False Or itemnum MAX_ITEMS Then Exit Function End If For i = 1 To MAX_INV If GetPlayerInvItemNum(index, i) = itemnum Then If Item(itemnum).Type = ITEM_TYPE_CURRENCY Then HasItemamount = GetPlayerInvItemValue(index, i) Else HasItemamount = HasItemamount + 1 End If End If Next End Function ``` And ``` Sub HandleTakeItem(ByVal index As Long, ByVal itemname As Long, ByVal Amount As Long) Dim i As Long If Item(itemname).Type = ITEM_TYPE_CURRENCY Then TakeInvItem index, itemname, Amount Else For i = 1 To Amount TakeInvItem index, itemname, 1 Next End If End Sub ``` Find ``` ' check has the cost item itemamount = HasItem(index, .CostItem) itemamount1 = HasItem(index, .CostItem1) itemamount2 = HasItem(index, .CostItem2) itemamount3 = HasItem(index, .CostItem3) itemamount4 = HasItem(index, .CostItem4) ``` Change this to - ``` ' check has the cost item itemamount = HasItemamount(index, .CostItem) itemamount1 = HasItemamount(index, .CostItem1) itemamount2 = HasItemamount(index, .CostItem2) itemamount3 = HasItemamount(index, .CostItem3) itemamount4 = HasItemamount(index, .CostItem4) ``` Find ``` ' it's fine, let's go ahead and steal all your stuff If .CostValue1 = 0 Then TakeInvItem index, .CostItem, .CostValue ElseIf .CostValue2 = 0 Then TakeInvItem index, .CostItem, .CostValue TakeInvItem index, .CostItem1, .CostValue1 ElseIf .CostValue3 = 0 Then TakeInvItem index, .CostItem, .CostValue TakeInvItem index, .CostItem1, .CostValue1 TakeInvItem index, .CostItem2, .CostValue2 ElseIf .CostValue4 = 0 Then TakeInvItem index, .CostItem, .CostValue TakeInvItem index, .CostItem1, .CostValue1 TakeInvItem index, .CostItem2, .CostValue2 TakeInvItem index, .CostItem3, .CostValue3 ElseIf .CostValue4 = 1 Then TakeInvItem index, .CostItem, .CostValue TakeInvItem index, .CostItem1, .CostValue1 TakeInvItem index, .CostItem2, .CostValue2 TakeInvItem index, .CostItem3, .CostValue3 TakeInvItem index, .CostItem4, .CostValue4 End If ``` Change this to ``` If .CostValue1 = 0 Then HandleTakeItem index, .CostItem, .CostValue ElseIf .CostValue2 = 0 Then HandleTakeItem index, .CostItem, .CostValue HandleTakeItem index, .CostItem1, .CostValue1 ElseIf .CostValue3 = 0 Then HandleTakeItem index, .CostItem, .CostValue HandleTakeItem index, .CostItem1, .CostValue1 HandleTakeItem index, .CostItem2, .CostValue2 ElseIf .CostValue4 = 0 Then HandleTakeItem index, .CostItem, .CostValue HandleTakeItem index, .CostItem1, .CostValue1 HandleTakeItem index, .CostItem2, .CostValue2 HandleTakeItem index, .CostItem3, .CostValue3 ElseIf .CostValue4 0 Then HandleTakeItem index, .CostItem, .CostValue HandleTakeItem index, .CostItem1, .CostValue1 HandleTakeItem index, .CostItem2, .CostValue2 HandleTakeItem index, .CostItem3, .CostValue3 HandleTakeItem index, .CostItem4, .CostValue4 End If ``` This should fix up any issues that where present, now I understand eclipse better I found a few logical errors in my code. Sorry for the inconvenience.
-
[Pay'd] Searching for talented individual for adaptable GUI design
zerohero replied to zerohero's topic in Talent Center
I am searching for one talented individual with proven experience in GUI design to create a base GUI that can be easily adapted and modified for use with a number of varying objects within my game. I am working in the eclipse 3.0 engine with a heavily custom graphical interface, as such all designs will have to be compatible with alpha transparency. I am willing to pay a fixed price for the design, this will be negotiable once we have established a rough idea of how much work needs to be done. You will be fully credited for your work within the game and providing you are interested of-course continued and varying job offers may come your way. I am hoping for a fast turn-around on this project and as such if you do not have the free time to complete it than please do not apply. Anyone wishing to apply for the job please private message or post here, giving examples of previous work and a little information about yourself. So the final criteria is - . To create a good looking, functional and adaptable user interface . Proven experience in GUI and general graphic design . Enough free time to complete the project promptly . Have knowledge of eclipse engine and transparency Many thanks, zero. -
@Erwin: > I think its already clear enough in the Source Tutorial board, tutorials that work for EO 3.0 are tagged with [EO - Event System 3.0] and for EO 2.0 with [EO 2.0], if we stick to that and people edit their tutorials if they don't have on of these tags then I think its good. I dont see why people feel the need to put [EO - Event system 3.0], surely EO 3.0 suffices?
-
Sorry I meant actually in the server code do you have the functiona set up? If so can we see that
-
Do you have your 'SPlayerThirst' set up in the server correctly? If so post that too.
-
@DepTa: > Can you give a tutorial with pictures? I do not know where the location of his or her edit it :( In visual basic things are 'layered' on-top of each other. This means that the object that is on top of them is the one that is viewable. If you click the current visible item (in your picture that is the character creation screen) and then right click it the mouse will pop up with a few options, one of these will be 'send to back'. Do that and any objects that are behind that object will become visible. Such basic concepts shouldn't need so much in-depth explanation!
-
Hiya guys, As many if you may know vb6 out of the box does not support mouse wheel scrolling. This is annoying to say the least. So without further ado here is a short guide, for those who have not or do not know how to enable mouse scrolling within visual basic 6. Firstly download the required files from this location, this contains everything that you will need - [http://download.microsoft.com/download/e/f/b/efb39198-7c59-4ace-a5c4-8f0f88e00d34/VB6MouseWheel.EXE](http://download.microsoft.com/download/e/f/b/efb39198-7c59-4ace-a5c4-8f0f88e00d34/VB6MouseWheel.EXE) Extract the files somewhere safe where they will not be moved, I put mine in a folder called 'scroll' and then placed it in the 'Windows' folder. Now enter '**run**', there are many methods of doing this. I personally used windows key and r but you can search for it in your start-bar (vista and windows 7) or xp users it should be there already. Once you have run open type in **regsvr32** followed by the location of the dll that was included in the file you extracted, example - ``` regsvr32 C:\Windows\scroll\VB6IDEMouseWheelAddin.dll ``` It should not have registered the dll. Fire up visual basic and click '**Add-Ins'** at the top center.  Once you have done that hit the **'Add-in Manager**' tab and a new window will pop up Once the new window pops up find '**MouseWheel** Fix' and double click it to activate it. Also be sure to click the 'Load on Startup tickbox' so that it continues to run whenever you fire up visual basic. Now Hit ok and you are done!
-
@Deathbeam: > This will or freeze gamescreen or it will drop that shadow thing I tested it using a picturebox and it seemed just fine to me, I will do some further testing using both methods and give a definitive answer.
-
This isn't really a very good way of moving a physical object within visual basic. Why not just use the .move functionality? Example - ``` PictureExample.Move PictureExample.Left - (StartX- X), PictureExample.Top - (StartY- Y) ``` All you need to do with this method is add an onmousedown event and manage the StartX/Y cords from there.
-
At present eclipse does not support multi-character accounts out of the box. It would require either coding yourself or ripping from previous versions which have the functionality to do so. So unless someone goes and does all the work for you without coding there is little chance you be able to.
-
I always looked at it in terms of one characters strength is another weakness. A good game can balance these using variation and differentiation. For example you say you have a warrior that is very strong, but what is his weakness? Is his equipment or strength making him move slower? does his stats mean slower health regeneration? Is he more susceptible to magic attacks due to the nature of his armour? All this must be taken into consideration, especially in a game that boats player v player combat.