
Escape
Members-
Posts
9 -
Joined
-
Last visited
Never
Escape's Achievements
Newbie (1/14)
0
Reputation
-
Who has the ultimate avatar? Post your avatar and where you got it from.
-
I know it sucks but wtf. I used 3d box maker.
-
Can you believe that unnown can speak Dutch or does he use an online translator?
-
I was bored so I've thrown this little tut together. This tut is mainly for TE but EE would work but be harder as I'm using TE outlines. First we're going to make the main GUI. I'm currently making a flash guide for this so be patient. YOU WILL NEED… 1\. Paint.NET (Download - http://www.dotpdn.com/downloads/pdn.html) 2\. TE/EE Outlines (TE OUTLINES - http://duckyp.org/files/TEOutlines.zip) INTRODUCTION We're going to say that our game is called SpiderPig Online. First I'm going to be making the ingame GUI then we I'm bored again I'll do another part of the GUI for SpiderPig Online. First you must unzip the GUI outlines to My Documents. **STEP 1** First Open up paint.net from your desktop. **STEP 2** Next open up the GUI outline called game.gif from the folder TEOutlines in My Documents (depending on where you unzipped to). DON'T OPEN THE ZIPPED ONE!  Step 2.1  **STEP 3** Then you need to double click on Background in the layers window and then change the name to say, Outline or something.  **STEP 4** Now you must create 2 new layers by clicking the paper with plus sign on it. Below is a diagram of all the buttons on the layers window…  **STEP 5** Now using the same method as before and rename the new layers to Background and Foreground.  Now you must move the background layer to the bottom and the foreground layer to the middle by using the blue arrows. Make the layers look like above. **STEP 6** Now you must select the colours for your background. We're going to be using a gradient effect so you need to change between the secondary and primary colours using the drop down menu. You must then select the colours. Use the colour wheel. We're selecting orange and white.  **STEP 7** When you've selected the colours you want, click on the highlighted picture in the tool box. (HANDY HINT: On the layers window make sure you have the background layer selected) Now you just click on the picture and presto! You should have a gradient effect. Sometimes only your primary colour appears to change that just click and drag one of the two dots! Now you picture should look like this with your colours… 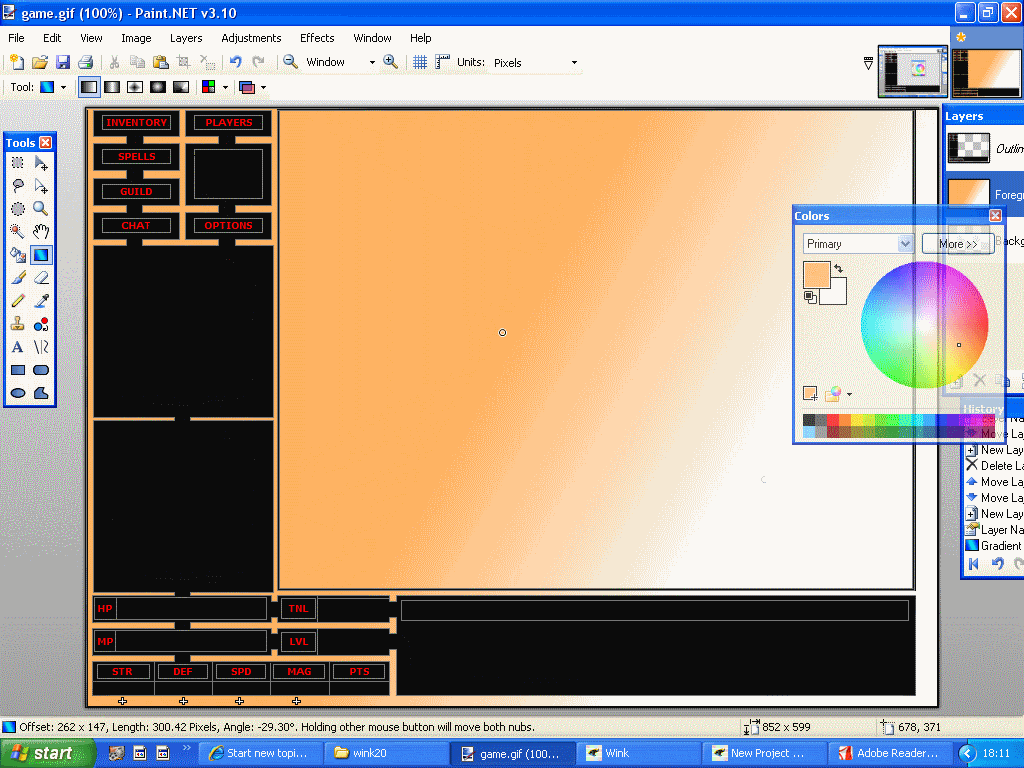 **STEP 8** (This step is optional. If this if your first GUI then do these steps. If you are more experienced then skip them and go to step 11) Now you must create a new layer and name it Overlay (HANDY HINT: Make sure overlay is the top layer)  **STEP 9** Now select the overlay layer and click on the square tool. Select draw shape outline and then select a colour that is not used in any of the GUI. Bright Pink is good. I've used red but you can use otherwise. 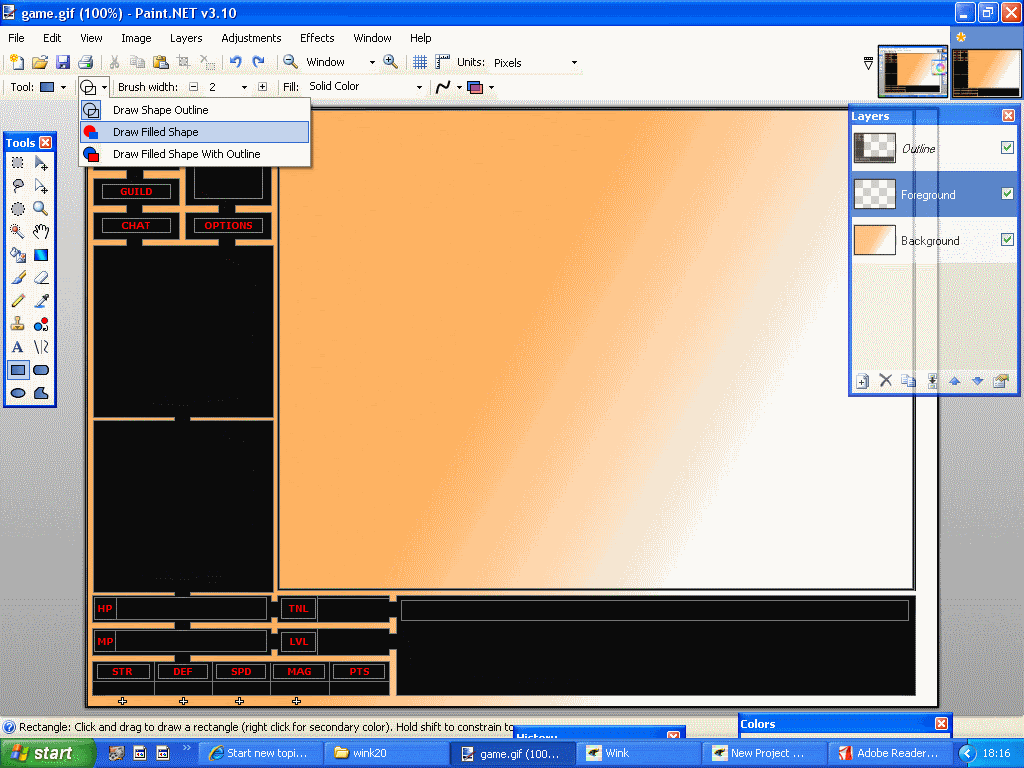 **STEP 10** Now start drawing rectangles around every single button and stat bar. Also draw one around where the game will go until you get something like this…  **STEP 11** (Select the foreground layer and make the foreground layer the second to top layer with the outline layer being second to bottom) Now you need to using the text tool (the button with the A in it) write over every button it's use like below. I'm sorry for the mix up with the picture above already having the writing on. 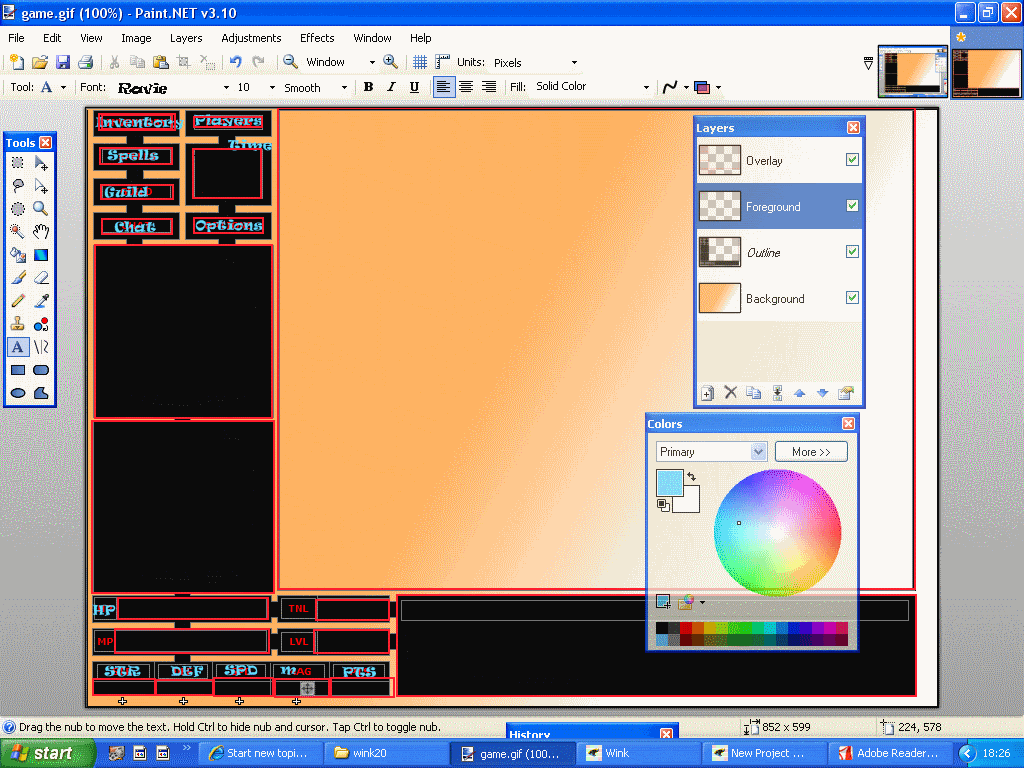 **STEP 12** Now we need to select the rectangle tool and change it to filled with outline. 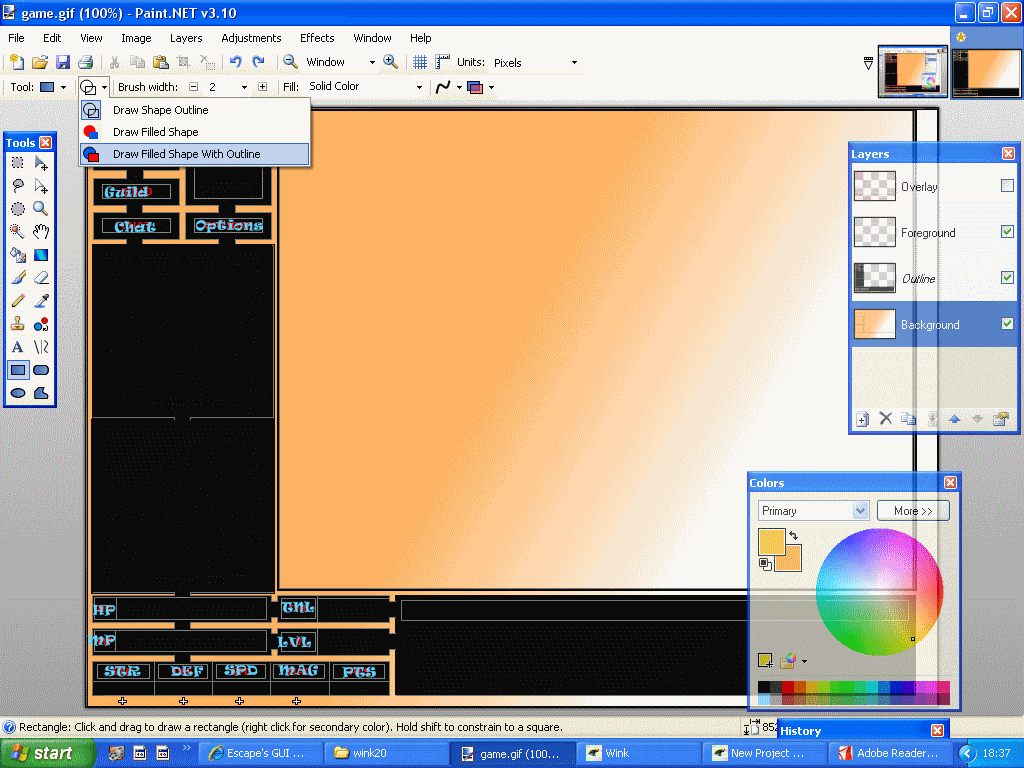 **STEP 13** Now click on the back ground layer an change the two colours. The primary is the outline colour and the secondary is the fill colour for the shape. Another cool effect is to have a thick line especially if your outline is black. It gives a cartoony feel. How to change the line thickness is in step 13.1.  **Step 13.1** Here's how to change the line thickness. 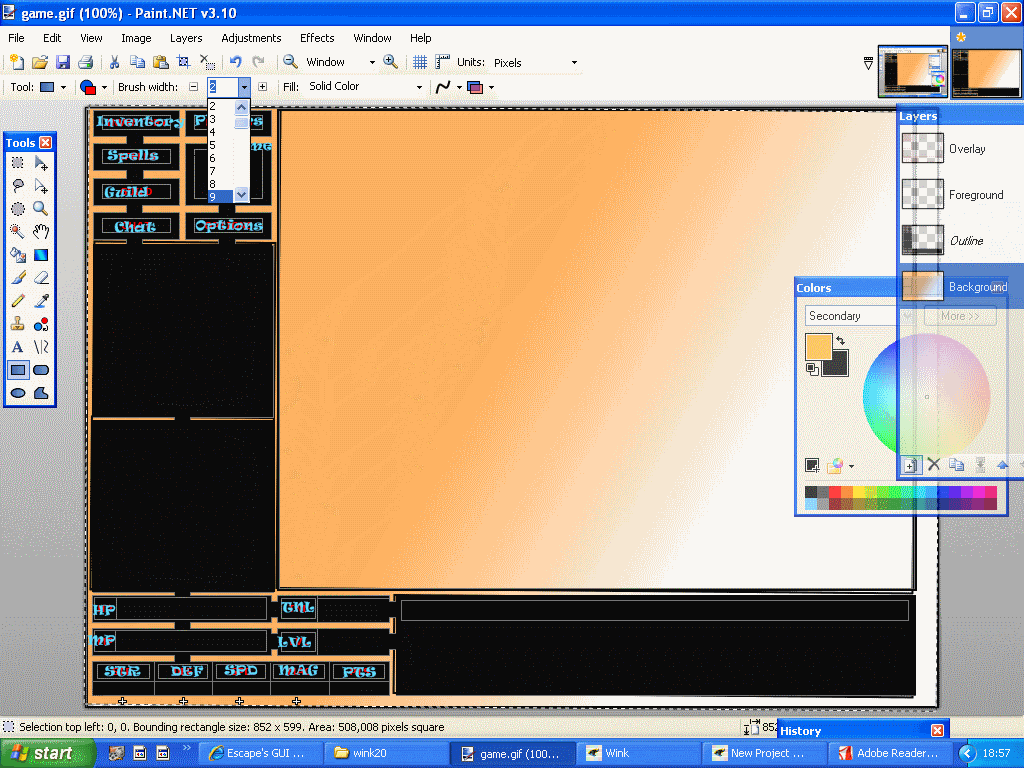 **STEP 14** Now start drawing squares around the buttons. You won't be able to see the squares appearing if you don't untick the box next to outline and overlay! Make something like this… 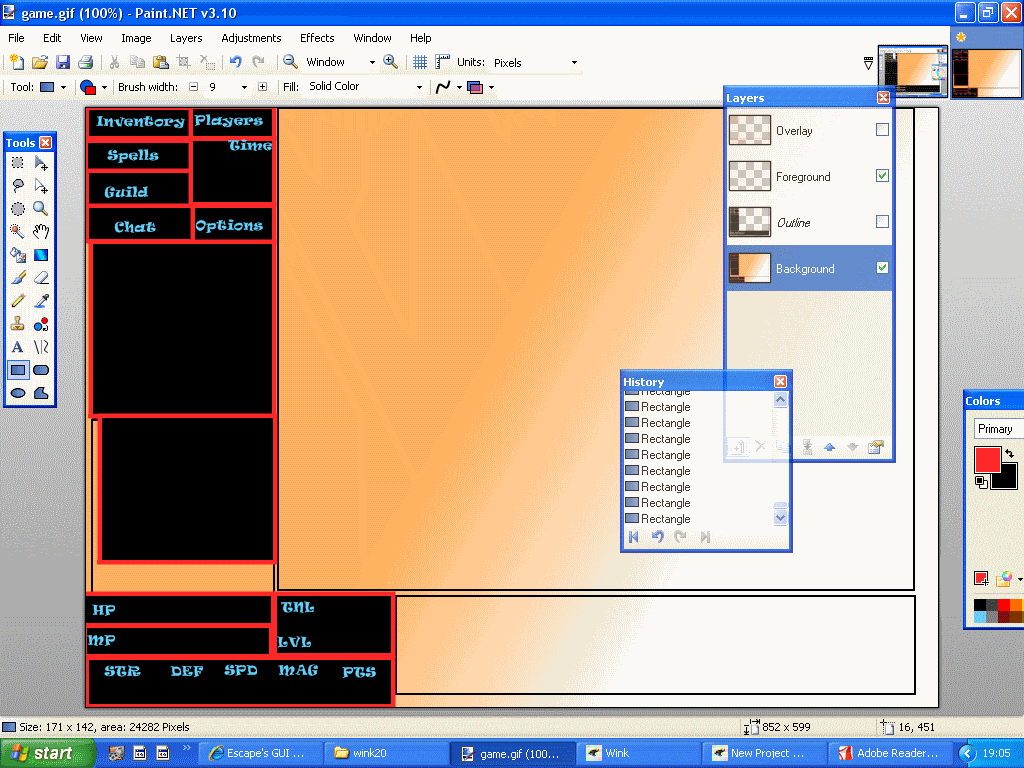 **STEP 15** Now you're done! You just need to save it. To save it click file save as and then go to your client folder. Then click on the GUI folder and select game.gif. Save the game as a .gif and make sure you replace the old game GUI with the new one. Now do all the default options and save it! TROUBLESHOOTING 1\. Make sure it's saved as a .gif 2\. Save it as the right name and delete the old GUI Please post any other fixes to problems that may occur! **HOPE YOU LIKE THE GUIDE!**
-
Basically you ask a question like do you like pink and say the next person to post says no you then edit you post with the question to something funny like, Say no if you are stupid or whatever. Then someone else makes another question and so on. I'll start, Say why if your insolent and putrid!
-
How many d's in Indiana Jones? The forum has 45 tries until I reveal! Remember it goes through once. Try Users… Enigm@x (1 try) TT Snim (1 try) Ilael (1 try) Any_Key (1 try) «»Shadowwulf«» (1 try)
-
Hi I'm a GUI maker looking for work. My fee is a small ad to be placed on any of the GUI parts apart from config you choose! I will post examples in a minute! I can also make banners and sigs. I do not do sprites and items ect. UPDATE 1… Here are some screenies. These are being used for Escape, my game... Ingame GUI http://i194.photobucket.com/albums/z184/rct3/game.gif Loading Bar http://i194.photobucket.com/albums/z184/rct3/Loading.gif Login http://i194.photobucket.com/albums/z184/rct3/Login.gif
-
How do you resize maps to like scroll instead of having lots of little maps.
